Overview
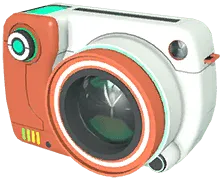
The Camera is a permanent, reusable key item that unlocks Pokémon photography in Pokémon GO at no consumable cost. Every Trainer receives one automatically at Level 1 in the current leveling system, and it cannot be discarded from the Item Bag. You can use the Camera during wild encounters, with any Pokémon in your storage, or while interacting with your Buddy. Taking photos completes Field and Special Research tasks, earns daily Buddy affection, and triggers surprise photobomb encounters.
When completing research, note that a task requiring a snapshot of a wild Pokémon must be taken on the encounter screen before capture, which is tracked separately from taking a GO Snapshot of a Buddy or a Pokémon you already own.
How to get it
Granted automatically to every Trainer at Level 1 as a permanent, built-in key item in the Item Bag. It cannot be discarded and never requires replacement copies or paid uses.
How to use it
Start a photo session from a caught Pokémon's summary screen, the Buddy play screen, the Camera icon in the Item Bag or Main Menu, or the camera icon during a wild encounter.
Pay close attention to research task wording: tasks asking for a snapshot of a wild Pokémon must be taken during a wild encounter before catching it, whereas tasks asking for a Buddy or caught Pokémon require GO Snapshot.
Worth knowing
Surprise photobombs only trigger on the first photo of a GO Snapshot session. If a visitor appears in your shot, exit to the Map View to encounter and catch it; if none appears, exit and start a fresh session rather than taking repeated photos.
Smeargle can photobomb up to once per day year-round (copying your photographed Pokémon's Fast Attack and first Charged Attack), while special events can feature different species, allow Shiny Smeargle, and raise the daily photobomb limit.
Snapshot controls and photobombs
You can launch a photo session from a stored Pokémon's summary page, through the Play! button on your Buddy screen, from the Camera in your Item Bag or Main Menu, or via the camera icon during a wild encounter.
In GO Snapshot, you can place up to three Pokémon together by choosing a pre-made trio from the Suggested tab or manually picking up to three subjects from storage; tapping the + button in the bottom selection bar swaps your chosen Pokémon.
Opening the three-dot menu in the top-right corner gives you access to Reality Blending (which lets Pokémon walk behind real-world objects and can also be toggled via the Pikachu icon), Burst Mode, and a 5- or 10-second self timer.
Available controls depend on your device hardware and camera permissions.
Taking a snapshot of your Buddy earns 1 Affection Heart per day, or up to 2 Hearts if your Buddy is Excited or has been fed a Poffin.
The first photo taken in a GO Snapshot session can also trigger a surprise photobomb encounter, saving two copies of the picture to your device—one with the visitor and one without. Return to the Map View after exiting the session to start an encounter with the photobombing Pokémon.
Outside of special events, Smeargle is the standard year-round visitor, limited to at most one surprise encounter per day. The Smeargle that spawns copies the photographed Pokémon's current Fast Attack and first Charged Attack (excluding incompatible moves, and with randomized CP and IVs), and can only be Shiny during announced events that commonly raise the daily limit to five photobombs. Triggering surprise encounters also progresses the Cameraman medal.
In addition, the separate What's Your Favorite? feature—accessible from the Main Menu Camera icon, the Item Bag, or the login screen—lets you take rear-camera photos with custom frames and a 5-second timer featuring almost any Pokémon in the game, even species you have not caught yet (excluding certain forms such as Shiny Pokémon).
Placing Pokémon and saving the shot
When using AR mode, stand in a well-lit area and pan your camera slowly across a flat surface until yellow footsteps and sparkling ground markers appear. You can place a Pokémon by tapping the footsteps, dragging a Pokémon from the bottom selection bar onto a surface (such as on top of a table), or tilting your phone upward to align the blue horizon line to place Flying-type Pokémon in mid-air.
Once placed, tap a Pokémon once to make it strike a pose, or swipe across it to turn it toward the camera. Tapping the rotation icon enters play mode, where you can drag a toy across the screen to guide the attention of up to three placed Pokémon toward your lens. Use the bottom selection bar to recall or reposition subjects at any time, and enable Burst Mode if you want to capture three photographs with a single shutter press.
Full AR mode requires an iPhone running iOS 15 or later, or a 64-bit Android device that supports Google Play Services for AR (ARCore). Devices without supported AR hardware can still take Pokémon snapshots against a static background. Keep in mind that camera access and device storage (photo-saving) access are separate permissions.
If storage permission is turned off, your snapshots still count in-game toward Buddy hearts, research tasks, and photobombs, but the image files will not save to your phone's photo gallery.
Immediately after finishing a GO Snapshot session, you can decorate your photo using Stickers, which the photo editor refers to as Flair. You can place Flair onto the image, rotate a Sticker with two fingers, pinch to resize it, or remove it before finishing. Saving the decorated photo permanently consumes the applied Stickers from your inventory, while the Camera itself remains completely reusable.