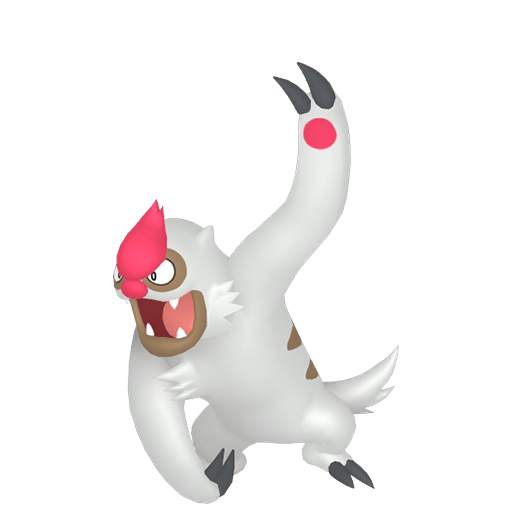
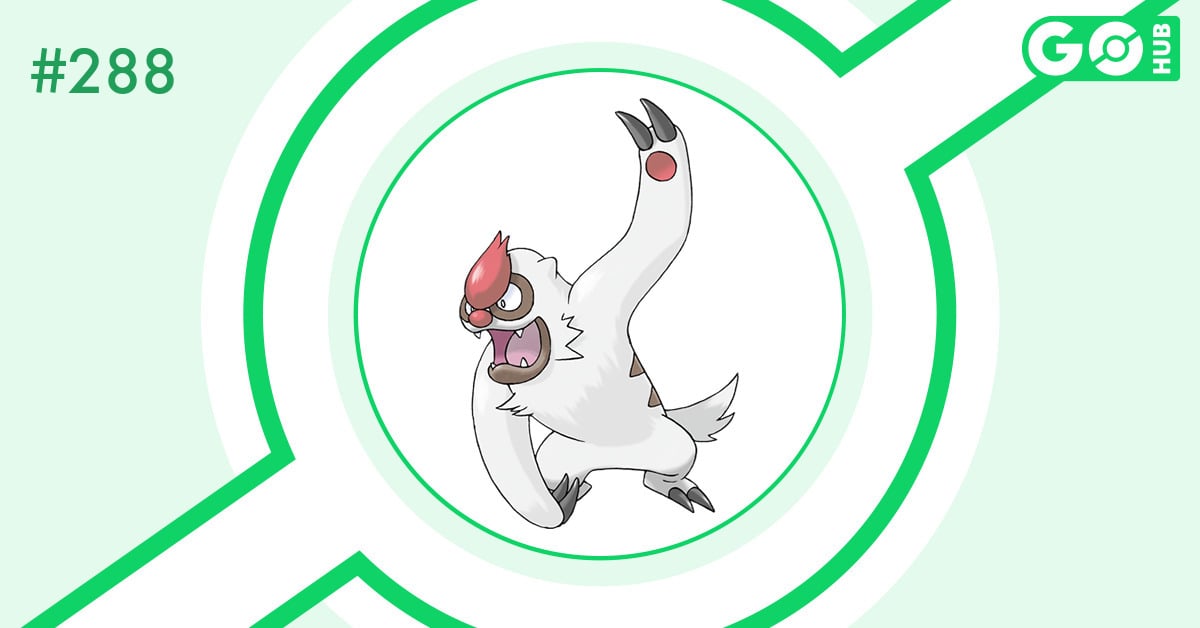
Muntier

Inhaltsverzeichnis
Muntier ist ein Pokémon vom Typ Normal in Pokémon GO. Als ein Pokémon vom Typ Normal ist Muntier anfällig gegenüber Kampf-Typ-Attacken.
Die maximale Wettkampfpunkte von Muntier beträgt 2225 WP, und das empfohlene Pokémon GO-Moveset ist Kratzer / Bodyslam. Begegnungen mit Muntier werden bei Teilweise bewölkt-Wetter verstärkt. Shiny Muntier ist verfügbar! ✨
Statuswerte und maximale WP von Muntier
Muntier Tier-Ranking
Muntier Typendiagramm
 Muntier nimmt erhöhten Schaden von:
 Muntier nimmt verringerten Schaden von:
Attacken-Analyse
# | Fast Attack | Charged Attack | DPS | TDO | Score 🔽 |
|---|---|---|---|---|---|
| 1. | 8.43 | 128.9 | 7.25 | ||
| 2. | 8.07 | 123.4 | 6.94 | ||
| 3. | 7.89 | 120.6 | 6.78 | ||
| 4. | 7.72 | 117.9 | 6.63 | ||
| 5. | 7.46 | 114.1 | 6.42 | ||
| 6. | 7.41 | 113.2 | 6.37 | ||
| 7. | 7.08 | 108.2 | 6.09 | ||
| 8. | 6.83 | 104.5 | 5.88 |
Sofort-Attacken
 Konter
 13
13 9
9 1.0s
1.0s
Typ-Effektivitätsdiagramm - 160.0%
 Normal
 Gestein
 Stahl
Stahl Eis
Eis Unlicht
- 62.5%

 Gift
Gift Käfer
Käfer Psycho
 Fee
Fee
- 39.1%
 Geist
Geist
Arena- und Raid-Kämpfe Schaden 13 Energie 9 Wetterbonus  Bewölkt
Dauer 1.0s Schadensfenster 0.8s - 1.0s Trainer-Kämpfe Schaden 8 Energie 6 Effekte Konter has no special effects.Sieh dir die Konter Detailseite an ↗  Kratzer640.5s
Typ-Effektivitätsdiagramm - 62.5%
- Gestein
- Stahl
- 39.1%
- Geist
Arena- und Raid-Kämpfe Schaden 6 Energie 4 Wetterbonus  Teilweise bewölkt
Dauer 0.5s Schadensfenster 0.3s - 0.5s Trainer-Kämpfe Schaden 4 Energie 2 Effekte Kratzer has no special effects.Sieh dir die Kratzer Detailseite an ↗
Lade-Attacken
- Durchbruch40331.5s
Typ-Effektivitätsdiagramm - 160.0%
- Normal
- Gestein
- Stahl
- Eis
- Unlicht
- 62.5%
- Gift
- Käfer
- Psycho
- Fee
- 39.1%
- Geist
Arena- und Raid-Kämpfe Schaden 40 Energie 33 Wetterbonus - Bewölkt
Dauer 1.5s Schadensfenster 0.7s - 1.3s Trainer-Kämpfe Schaden 50 Energie 40 Effekte  Special
Durchbruch has a 100.0% chance to:
- Decrease Target's Defense by 20.0%
Sieh dir die Durchbruch Detailseite an ↗  Dampfwalze80503.5s
Typ-Effektivitätsdiagramm - 160.0%
- Gift
- Gestein
- Stahl
 Feuer
Feuer Elektro
- 62.5%
- Käfer
 Pflanze
- 39.1%
Arena- und Raid-Kämpfe Schaden 80 Energie 50 Wetterbonus  Sonnig
Dauer 3.5s Schadensfenster 2.6s - 3.1s Trainer-Kämpfe Schaden 45 Energie 45 Effekte SpecialDampfwalze has a 50.0% chance to:
- Decrease Target's Defense by 20.0%
Sieh dir die Dampfwalze Detailseite an ↗ - Bodyslam50332.0s
Typ-Effektivitätsdiagramm - 62.5%
- Gestein
- Stahl
- 39.1%
- Geist
Arena- und Raid-Kämpfe Schaden 50 Energie 33 Wetterbonus - Teilweise bewölkt
Dauer 2.0s Schadensfenster 1.3s - 1.8s Trainer-Kämpfe Schaden 55 Energie 35 Effekte Bodyslam has no special effects.Sieh dir die Bodyslam Detailseite an ↗  Steinhagel75502.5s
Typ-Effektivitätsdiagramm - 160.0%
- Käfer
- Feuer
- Eis
- 62.5%
 Kampf
Kampf Boden
Boden- Stahl
Arena- und Raid-Kämpfe Schaden 75 Energie 50 Wetterbonus - Teilweise bewölkt
Dauer 2.5s Schadensfenster 1.3s - 2.4s Trainer-Kämpfe Schaden 75 Energie 45 Effekte Steinhagel has no special effects.Sieh dir die Steinhagel Detailseite an ↗
 Mehr Informationen
Die folgende Tabelle zeigt Muntiers DPS und TDO für jede Kombination aus Schnell- und Lade-Moves. Diese Tabelle ist nützlich, um die relative Stärke von Muntiers Movesets zu vergleichen. Du kannst das Wetter und das gegnerische Pokémon ändern, um zu sehen, wie es die Rankings beeinflusst.
Legacy Top-Schnell- und Lade-Attacken können nur während spezieller Events erhalten werden oder indem ein Top-Schnell-TM oder ein Top-Lade-TM verwendet wird. Legacy-Attacken sind mit einem Sternchen (*) markiert. Die obige Tabelle bietet Informationen zu verschiedenen Attacken von Muntier in Pokémon GO, zusammen mit ihren entsprechenden DPS (Schaden pro Sekunde) und TDO (Totaler Schadensausstoß).
Muntier in der Meta
 PvE-Analyse
Empfohlene Attacken
 PvP-Analyse
Empfohlene Attacken
- Superliga:Konter Bodyslam Steinhagel
- Hyperliga:Konter Bodyslam Steinhagel
Noch nicht analysiert, komm bald wieder!
Pokédex-Informationen

| Pokédex-Nr. | #288 |
|---|---|
| Höhe | 1.4 m |
| Gewicht | 46.5 kg |
| Region | Generation 3 |
| Kann gehandelt werden | Erlaubt |
| Kumpel-Distanz | 5 km |
| Veröffentlicht | Ja |
| Schillernd veröffentlicht | Ja |
| Pokémon Home Transfer | Erlaubt |
| Basisfangrate | 20% |
| Basisfluchtrate | 0% |
| Fangbelohnungen | |
| Zusätzliche Attackeskosten |
Entwicklungstabelle
Mehr Informationen
Muntier Familie
Eine Liste von Pokémon, die in irgendeiner Weise mit Muntier in Pokémon GO verwandt sind. Beinhaltet Entwicklungen, regionale und Form-Variationen.
Größeninformation
| XXS | XS | M | XL | XXL |
|---|---|---|---|---|
| 0.69 m | 0.7 m | 1.4 m | 2.1 m | 2.17 m |
Die Größe von Muntier reicht von 0.69 m bis 2.17 m, mit einem Durchschnitt von 1.4 m. Die Illustration zeigt einen Vergleich mit einem 1,70 m (5′07″) großen Trainer. Die maximale Höhe wurde aus Darstellungsgründen auf 450px begrenzt.
Größengrenzen
Diese Tabelle zeigt die Größengrenzen von Muntier in Pokémon GO. Die Grenzwerte entsprechen dem minimalen und maximalen Wert jeder Größenkategorie.
| Größe | Untere Grenze | Obere Grenze |
|---|---|---|
| XXS | 0.686 m | 0.7 m |
| 2′03″ | 2′04″ | |
| XS | 0.7 m | 1.4 m |
| 2′04″ | 4′07″ | |
| M | 1.05 m | 1.75 m |
| 3′05″ | 5′09″ | |
| XL | 1.75 m | 2.1 m |
| 5′09″ | 6′11″ | |
| XXL | 2.1 m | 2.17 m |
| 6′11″ | 7′01″ |
Begegnungsdaten
| Bewegungstyp | MOVEMENT_JUMP |
|---|---|
| Bewegungstimer | 11s |
| Sprungzeit | 2s |
| Angriffswahrscheinlichkeit | 70.0% |
| Angriffstimer | 20s |
| Ausweichwahrscheinlichkeit | 20.0% |
| Ausweichdauer | 0.0s |
| Ausweichdistanz | 1 |
| Minimale Aktionsfrequenz | 1s |
| Maximale Aktionsfrequenz | 2s |
Muntier WP-Tabelle
Muntier hat ein maximales Wettkampfpunkte (WP) von 2225 (auf Level 50). Ein aus Raids erhaltenes Muntier kann mit einem WP von 1061 bis 1124 angetroffen werden, oder bei Wetterverstärkung im Bereich von 1327 WP bis 1405 WP. In Feld- und Spezialforschungen kann Muntier im Bereich von 796 WP bis 843 WP gefunden werden.
| 2225 WP | |
| Level 50, 15/15/15 IVs | |
| 796 WP - 843 WP | |
| Level 15, mindestens 10/10/10 IVs | |
| 1061 WP - 1124 WP | |
| Level 20, mindestens 10/10/10 IVs | |
| 1061 WP - 1124 WP | |
| Level 20, mindestens 10/10/10 IVs | |
| 1327 WP - 1405 WP | |
| Mit Wetterbonus, Level 25, mindestens 10/10/10 IVs |
 Mehr Informationen
- Feld- und Spezialforschungsbegegnungen sind immer Level 15. IVs reichen von 10 (min) bis 15 (max). Feldforschungsbegegnungen haben eine IV-Untergrenze von 10/10/10.
- Aus Eiern geschlüpfte Pokémon sind immer Level 20. IVs reichen von 10 (min) bis 15 (max). Eier-Schlüpflinge haben eine IV-Untergrenze von 10/10/10.
- Raid-Bosse ohne Wetterbonus gefangen sind immer Level 20. IVs reichen von 10 (min) bis 15 (max). Raid-Fänge haben eine IV-Untergrenze von 10/10/10.
- 😈 Schatten-Pokémon haben eine IV-Untergrenze von 6/6/6 in Raids.
- Mit Wetterbonus gefangene Raid-Bosse sind immer Level 25. IVs reichen von 10 (min) bis 15 (max). Mit Wetterbonus gefangene Raid-Bosse haben eine IV-Untergrenze von 10/10/10.
- 😈 Schatten-Pokémon haben eine IV-Untergrenze von 6/6/6 in Raids.
- Wilde Begegnungen reichen von Level 1 bis Level 30 Pokémon. Ihre IVs reichen von 0 (min) bis 15 (max) für jeden Wert.
- Wetterverstärkte wilde Pokémon-Begegnungen erhalten einen 5-Level-Boost, wodurch ihr Levelbereich auf Level 6 bis Level 35 erhöht wird. Zusätzlich haben sie einen garantierten Mindest-IV-Wert von 4 für jeden Wert, was zu einer IV-Untergrenze von 4/4/4 führt.
Maximale Wettkampfpunkte pro Level-Diagramm
Muntier Max WP pro Level-Diagramm. Diese Tabelle zeigt maximale Wettkampfpunkte von Level 1 bis Level 50.
| LVL | Max WP | LVL | Max WP | LVL | Max WP |
|---|---|---|---|---|---|
| 1 | 27 WP | 2 | 87 WP | 3 | 146 WP |
| 4 | 206 WP | 5 | 265 WP | 6 | 324 WP |
| 7 | 384 WP | 8 | 443 WP | 9 | 503 WP |
| 10 | 562 WP | 11 | 618 WP | 12 | 674 WP |
| 13 | 731 WP | 14 | 787 WP | 15 | 843 WP |
| 16 | 899 WP | 17 | 956 WP | 18 | 1012 WP |
| 19 | 1068 WP | 20 | 1124 WP | 21 | 1180 WP |
| 22 | 1237 WP | 23 | 1293 WP | 24 | 1349 WP |
| 25 | 1405 WP | 26 | 1462 WP | 27 | 1518 WP |
| 28 | 1574 WP | 29 | 1630 WP | 30 | 1687 WP |
| 31 | 1715 WP | 32 | 1743 WP | 33 | 1771 WP |
| 34 | 1799 WP | 35 | 1827 WP | 36 | 1855 WP |
| 37 | 1883 WP | 38 | 1911 WP | 39 | 1940 WP |
| 40 | 1968 WP | 41 | 1993 WP | 42 | 2018 WP |
| 43 | 2043 WP | 44 | 2069 WP | 45 | 2094 WP |
| 46 | 2120 WP | 47 | 2146 WP | 48 | 2172 WP |
| 49 | 2198 WP | 50 | 2225 WP |
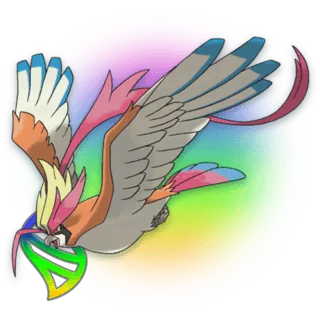
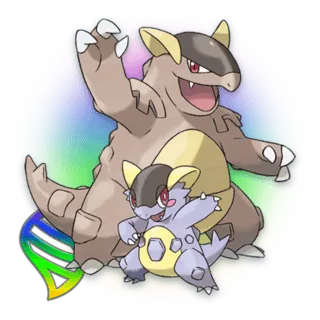
Mega-Pokémon, die Muntier verstärken
Eine Liste von Mega-Pokémon, die Muntiers Normal-Typ-Attacken, Bonbons und XL-Bonbons beim Fangen von Muntier verstärken.
 Normal


Mehr Informationen
Mega- und Primal-Raid-Bonus –Mega-Pokémon erhöhen die Angriffskraft aller anderen Pokémon in Raid-Kämpfen um 10%. Attacke, die den Typen des Mega-Pokémons entsprechen, erhalten einen 30% Bonus. Diese Boni addieren sich jedoch nicht, wenn mehrere Mega-entwickelte Pokémon gleichzeitig kämpfen; nur der höhere Bonus wird angewendet.
Mega- und Primal-Fangbonus –Während ein Pokémon Mega-entwickelt ist, werden zusätzliche EP und Bonbons gewährt, wenn ein Pokémon gefangen wird, das denselben Typ wie das Mega-Pokémon hat, oder für jeden gefangenen Raid-Boss. Diese stapeln sich nicht miteinander. Außerdem gewähren hoch- und maximal-levelige Mega-entwickelte Pokémon eine erhöhte Chance, XL-Bonbons zu erhalten, wenn ein Pokémon gefangen wird, das denselben Typ wie das Mega-Pokémon hat.
Hinweis zu Primal Kyogre, Primal Groudon und Mega Rayquaza- Primal Kyogre verstärkt Attacken und Pokémon vom Typ Wasser, Elektro und Käfer.
- Primal Groudon verstärkt Attacken und Pokémon vom Typ Feuer, Gras und Boden.
- Mega Rayquaza verstärkt Attacken und Pokémon vom Typ Flug, Drache und Psycho.
Fangrate und Power-Up-Kosten
Muntier Pokémon GO Power-Up-Kosten
| Sternenstaub | Bonbons | XL-Bonbons | |
|---|---|---|---|
| LVL 50 | 520,000 | 304 | 296 |
| LVL 40 | 280,000 | 304 | 10 |
| LVL 35 | 190,000 | 196 | - |
| LVL 30 | 125,000 | 126 | - |
| LVL 25 | 80,000 | 87 | - |
| LVL 20 | 47,500 | 58 | - |
| LVL 15 | 25,500 | 38 | - |
| LVL 10 | 11,000 | 19 | - |
| LVL 5 | 3,000 | 9 | - |
Power-Up-Kosten für Muntier in Pokémon GO. Die Tabelle zeigt den gesamten Sternenstaub, die Bonbons und die XL-Bonbons, die benötigt werden, um Muntier von Level 1 auf Level 15, 20, 25, 30, 35, 40 und 50 zu bringen. Es kostet dich 520,000 Sternenstaub, 304 Bonbons und 296 XL-Bonbons, um Muntier in Pokémon GO vollständig aufzuladen.
Vollständige Muntier Power-Up-Kosten-Tabelle
| LVL | Power-Ups | Sternenstaub | Bonbons | XL-Bonbons | Gesamter Sternenstaub | Gesamte Bonbons | Gesamte XL-Bonbons |
|---|---|---|---|---|---|---|---|
| 1 | 1 | 200 | 1 | - | 200 | 1 | - |
| 1.5 | 2 | 200 | 1 | - | 400 | 2 | - |
| 2 | 3 | 200 | 1 | - | 600 | 3 | - |
| 2.5 | 4 | 200 | 1 | - | 800 | 4 | - |
| 3 | 5 | 400 | 1 | - | 1,200 | 5 | - |
| 3.5 | 6 | 400 | 1 | - | 1,600 | 6 | - |
| 4 | 7 | 400 | 1 | - | 2,000 | 7 | - |
| 4.5 | 8 | 400 | 1 | - | 2,400 | 8 | - |
| 5 | 9 | 600 | 1 | - | 3,000 | 9 | - |
| 5.5 | 10 | 600 | 1 | - | 3,600 | 10 | - |
| 6 | 11 | 600 | 1 | - | 4,200 | 11 | - |
| 6.5 | 12 | 600 | 1 | - | 4,800 | 12 | - |
| 7 | 13 | 800 | 1 | - | 5,600 | 13 | - |
| 7.5 | 14 | 800 | 1 | - | 6,400 | 14 | - |
| 8 | 15 | 800 | 1 | - | 7,200 | 15 | - |
| 8.5 | 16 | 800 | 1 | - | 8,000 | 16 | - |
| 9 | 17 | 1,000 | 1 | - | 9,000 | 17 | - |
| 9.5 | 18 | 1,000 | 1 | - | 10,000 | 18 | - |
| 10 | 19 | 1,000 | 1 | - | 11,000 | 19 | - |
| 10.5 | 20 | 1,000 | 1 | - | 12,000 | 20 | - |
| 11 | 21 | 1,300 | 2 | - | 13,300 | 22 | - |
| 11.5 | 22 | 1,300 | 2 | - | 14,600 | 24 | - |
| 12 | 23 | 1,300 | 2 | - | 15,900 | 26 | - |
| 12.5 | 24 | 1,300 | 2 | - | 17,200 | 28 | - |
| 13 | 25 | 1,600 | 2 | - | 18,800 | 30 | - |
| 13.5 | 26 | 1,600 | 2 | - | 20,400 | 32 | - |
| 14 | 27 | 1,600 | 2 | - | 22,000 | 34 | - |
| 14.5 | 28 | 1,600 | 2 | - | 23,600 | 36 | - |
| 15 | 29 | 1,900 | 2 | - | 25,500 | 38 | - |
| 15.5 | 30 | 1,900 | 2 | - | 27,400 | 40 | - |
| 16 | 31 | 1,900 | 2 | - | 29,300 | 42 | - |
| 16.5 | 32 | 1,900 | 2 | - | 31,200 | 44 | - |
| 17 | 33 | 2,200 | 2 | - | 33,400 | 46 | - |
| 17.5 | 34 | 2,200 | 2 | - | 35,600 | 48 | - |
| 18 | 35 | 2,200 | 2 | - | 37,800 | 50 | - |
| 18.5 | 36 | 2,200 | 2 | - | 40,000 | 52 | - |
| 19 | 37 | 2,500 | 2 | - | 42,500 | 54 | - |
| 19.5 | 38 | 2,500 | 2 | - | 45,000 | 56 | - |
| 20 | 39 | 2,500 | 2 | - | 47,500 | 58 | - |
| 20.5 | 40 | 2,500 | 2 | - | 50,000 | 60 | - |
| 21 | 41 | 3,000 | 3 | - | 53,000 | 63 | - |
| 21.5 | 42 | 3,000 | 3 | - | 56,000 | 66 | - |
| 22 | 43 | 3,000 | 3 | - | 59,000 | 69 | - |
| 22.5 | 44 | 3,000 | 3 | - | 62,000 | 72 | - |
| 23 | 45 | 3,500 | 3 | - | 65,500 | 75 | - |
| 23.5 | 46 | 3,500 | 3 | - | 69,000 | 78 | - |
| 24 | 47 | 3,500 | 3 | - | 72,500 | 81 | - |
| 24.5 | 48 | 3,500 | 3 | - | 76,000 | 84 | - |
| 25 | 49 | 4,000 | 3 | - | 80,000 | 87 | - |
| 25.5 | 50 | 4,000 | 3 | - | 84,000 | 90 | - |
| 26 | 51 | 4,000 | 4 | - | 88,000 | 94 | - |
| 26.5 | 52 | 4,000 | 4 | - | 92,000 | 98 | - |
| 27 | 53 | 4,500 | 4 | - | 96,500 | 102 | - |
| 27.5 | 54 | 4,500 | 4 | - | 101,000 | 106 | - |
| 28 | 55 | 4,500 | 4 | - | 105,500 | 110 | - |
| 28.5 | 56 | 4,500 | 4 | - | 110,000 | 114 | - |
| 29 | 57 | 5,000 | 4 | - | 115,000 | 118 | - |
| 29.5 | 58 | 5,000 | 4 | - | 120,000 | 122 | - |
| 30 | 59 | 5,000 | 4 | - | 125,000 | 126 | - |
| 30.5 | 60 | 5,000 | 4 | - | 130,000 | 130 | - |
| 31 | 61 | 6,000 | 6 | - | 136,000 | 136 | - |
| 31.5 | 62 | 6,000 | 6 | - | 142,000 | 142 | - |
| 32 | 63 | 6,000 | 6 | - | 148,000 | 148 | - |
| 32.5 | 64 | 6,000 | 6 | - | 154,000 | 154 | - |
| 33 | 65 | 7,000 | 8 | - | 161,000 | 162 | - |
| 33.5 | 66 | 7,000 | 8 | - | 168,000 | 170 | - |
| 34 | 67 | 7,000 | 8 | - | 175,000 | 178 | - |
| 34.5 | 68 | 7,000 | 8 | - | 182,000 | 186 | - |
| 35 | 69 | 8,000 | 10 | - | 190,000 | 196 | - |
| 35.5 | 70 | 8,000 | 10 | - | 198,000 | 206 | - |
| 36 | 71 | 8,000 | 10 | - | 206,000 | 216 | - |
| 36.5 | 72 | 8,000 | 10 | - | 214,000 | 226 | - |
| 37 | 73 | 9,000 | 12 | - | 223,000 | 238 | - |
| 37.5 | 74 | 9,000 | 12 | - | 232,000 | 250 | - |
| 38 | 75 | 9,000 | 12 | - | 241,000 | 262 | - |
| 38.5 | 76 | 9,000 | 12 | - | 250,000 | 274 | - |
| 39 | 77 | 10,000 | 15 | - | 260,000 | 289 | - |
| 39.5 | 78 | 10,000 | 15 | - | 270,000 | 304 | - |
| 40 | 79 | 10,000 | - | 10 | 280,000 | 304 | 10 |
| 40.5 | 80 | 10,000 | - | 10 | 290,000 | 304 | 20 |
| 41 | 81 | 11,000 | - | 10 | 301,000 | 304 | 30 |
| 41.5 | 82 | 11,000 | - | 10 | 312,000 | 304 | 40 |
| 42 | 83 | 11,000 | - | 12 | 323,000 | 304 | 52 |
| 42.5 | 84 | 11,000 | - | 12 | 334,000 | 304 | 64 |
| 43 | 85 | 12,000 | - | 12 | 346,000 | 304 | 76 |
| 43.5 | 86 | 12,000 | - | 12 | 358,000 | 304 | 88 |
| 44 | 87 | 12,000 | - | 15 | 370,000 | 304 | 103 |
| 44.5 | 88 | 12,000 | - | 15 | 382,000 | 304 | 118 |
| 45 | 89 | 13,000 | - | 15 | 395,000 | 304 | 133 |
| 45.5 | 90 | 13,000 | - | 15 | 408,000 | 304 | 148 |
| 46 | 91 | 13,000 | - | 17 | 421,000 | 304 | 165 |
| 46.5 | 92 | 13,000 | - | 17 | 434,000 | 304 | 182 |
| 47 | 93 | 14,000 | - | 17 | 448,000 | 304 | 199 |
| 47.5 | 94 | 14,000 | - | 17 | 462,000 | 304 | 216 |
| 48 | 95 | 14,000 | - | 20 | 476,000 | 304 | 236 |
| 48.5 | 96 | 14,000 | - | 20 | 490,000 | 304 | 256 |
| 49 | 97 | 15,000 | - | 20 | 505,000 | 304 | 276 |
| 49.5 | 98 | 15,000 | - | 20 | 520,000 | 304 | 296 |
Sprites
Normal und Schillernd Muntier
Muntier hochauflösende Sprites
Muntier Pokédex-Einträge
Häufig gestellte Fragen
Was sind die Stärken und Schwächen von Muntier?
Als ein Pokémon vom Typ Normal ist Muntier anfällig gegenüber Kampf-Typ-Attacken.
Was sind die besten Attacken für Muntier in Pokémon GO?
Die besten Attacken für Muntier in Pokémon GO sind Kratzer und Bodyslam. Diese Moveset hat einen DPS (Schaden pro Sekunde) von 8,429 und einen TDO (Gesamtschaden) von 128,851.
Wie schlägt sich Muntier in Raids?
Muntier's Raid-Angreifer-Rang ist derzeit unbekannt, hat keine brauchbaren Moves oder ist zu schwach, um eingestuft zu werden.
Wie rangiert Muntier als Normal-Typ Angreifer?
Muntier ist ein F-Tier-Normal-Typ-Angreifer und wird nicht für Raid-Kämpfe empfohlen.
Welche Mega-Pokémon verstärken Muntier?
Die folgenden Mega-Pokémon verstärken Muntier: Mega Tauboss, Mega Kangama, Mega Schlapor und Mega Ohrdoch.
Was ist das maximale WP von Muntier auf Level 40 und Level 50?
Muntier’s maximales WP auf Level 40 beträgt 1968 WP und 2225 WP auf Level 50.
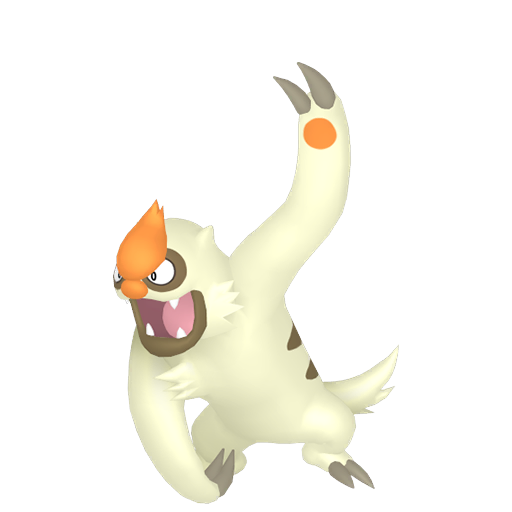
Kann Muntier als Schillernd in Pokémon GO erscheinen?
Muntier kann als Schillernd in Pokémon GO erscheinen ✨.
Kann Muntier in Pokémon GO dynamaximieren?
Muntier kann in Pokémon GO nicht dynamaximieren.


Noch nicht analysiert, komm bald wieder!