Gifthieb + Mülltreffer
Das beste Gift-Moveset für Sleimok ist Gifthieb / Mülltreffer mit 10.88 DPS und 233.9 TDO. Diese Attacken werden durch Bewölkt-Wetter verstärkt. Sleimok belegt mit diesem Moveset Platz #31 (B Tier) der Gift-Angreifer.

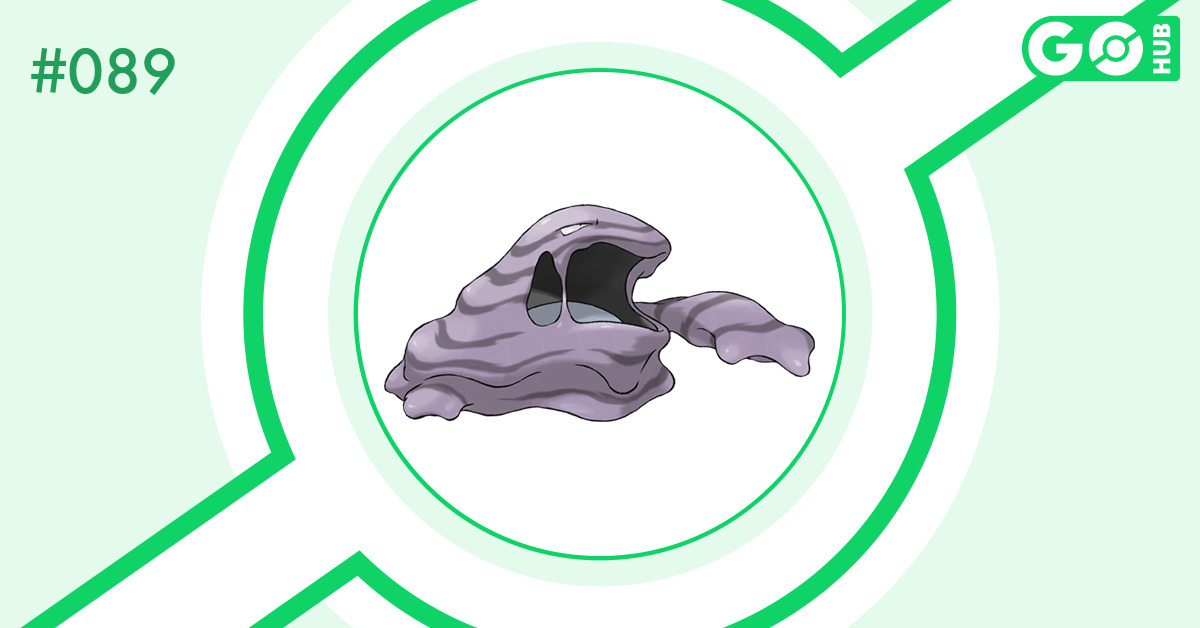
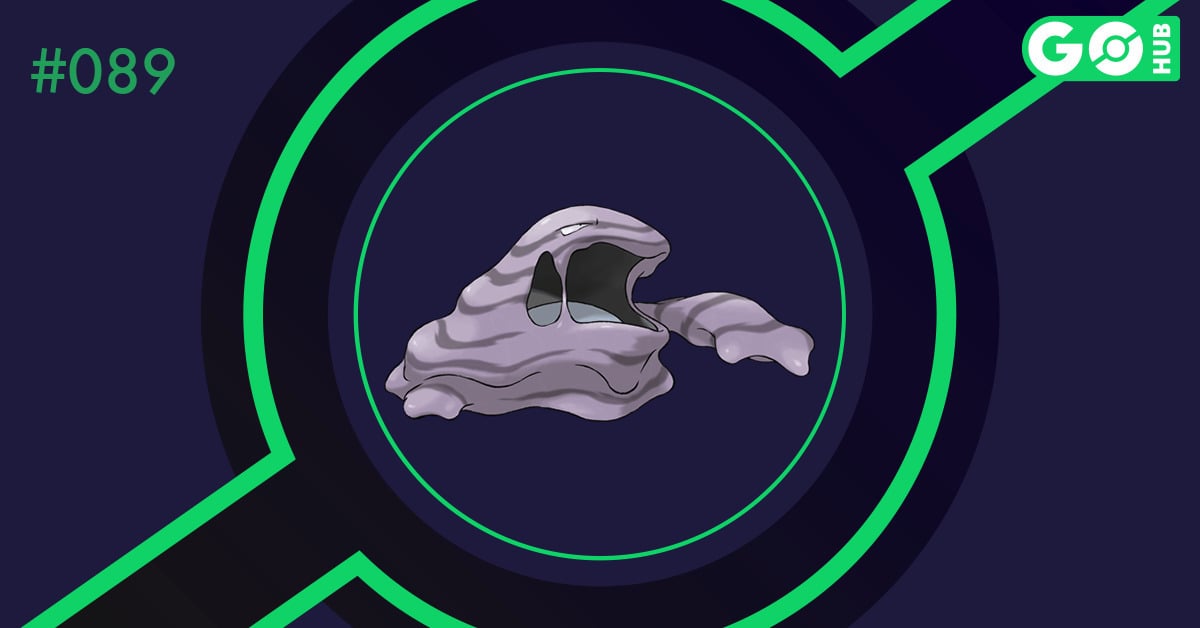
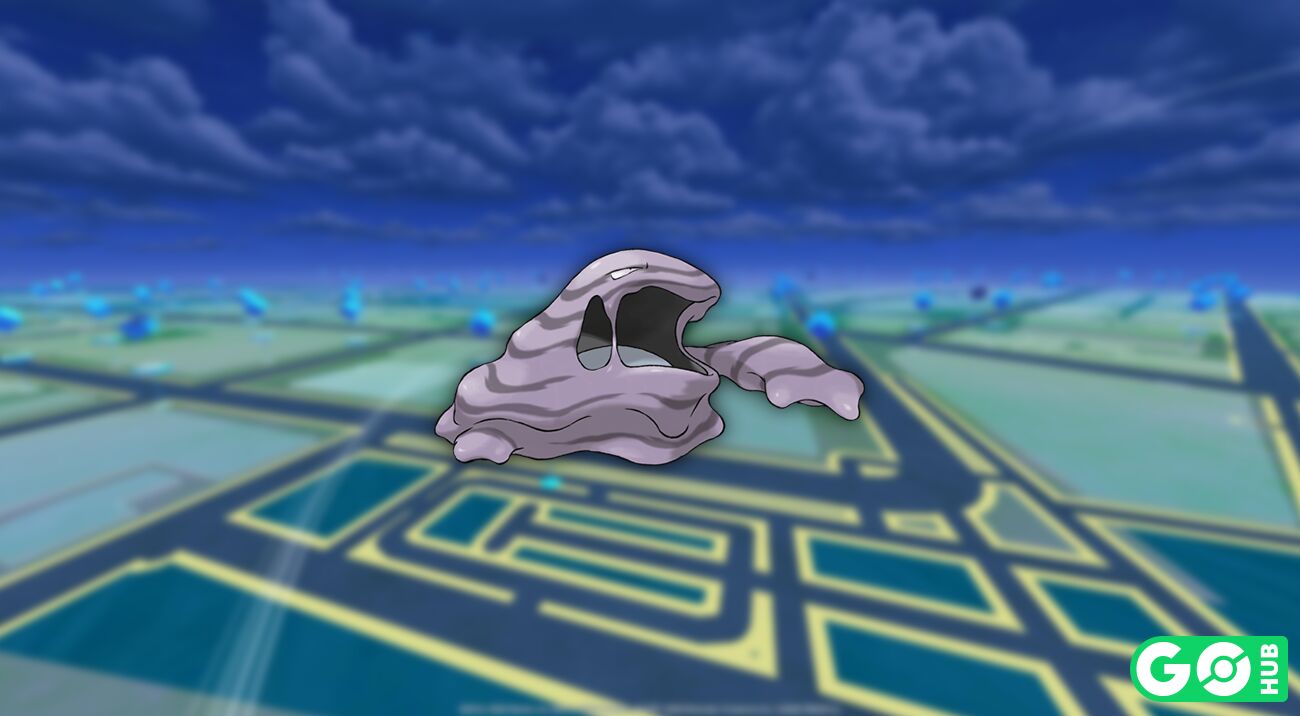
Sleimok ist ein Pokémon vom Typ Gift in Pokémon GO. Als ein Pokémon vom Typ Gift ist Sleimok anfällig gegenüber Boden und Psycho-Typ-Attacken.
Die maximale Wettkampfpunkte von Sleimok beträgt 3117 WP, und das empfohlene Pokémon GO-Moveset ist Gifthieb / Mülltreffer. Begegnungen mit Sleimok werden bei Bewölkt-Wetter verstärkt. Shiny Sleimok ist verfügbar! ✨
# | Fast Attack | Charged Attack | DPS | TDO | Score 🔽 |
|---|---|---|---|---|---|
| 1. | 10.88 | 233.9 | 9.75 | ||
| 2. | 10.27 | 220.9 | 9.21 | ||
| 3. | 9.93 | 213.7 | 8.90 | ||
| 4. | 9.68 | 208.1 | 8.67 | ||
| 5. | 9.39 | 201.9 | 8.42 | ||
| 6. | 9.19 | 197.7 | 8.24 | ||
| 7. | 9.08 | 195.3 | 8.14 | ||
| 8. | 8.62 | 185.3 | 7.72 |
| Schaden | 9 |
|---|---|
| Energie | 13 |
| Wetterbonus |
|
| Dauer | 1.0s |
| Schadensfenster | 0.8s - 0.9s |
| Schaden | 6 |
|---|---|
| Energie | 12 |
| Schaden | 5 |
|---|---|
| Energie | 6 |
| Wetterbonus |
|
| Dauer | 0.5s |
| Schadensfenster | 0.2s - 0.5s |
| Schaden | 3 |
|---|---|
| Energie | 3 |
| Schaden | 13 |
|---|---|
| Energie | 9 |
| Wetterbonus |
|
| Dauer | 1.0s |
| Schadensfenster | 0.4s - 1.0s |
| Schaden | 7 |
|---|---|
| Energie | 7 |
| Schaden | 80 |
|---|---|
| Energie | 50 |
| Wetterbonus |
|
| Dauer | 3.0s |
| Schadensfenster | 1.4s - 2.3s |
| Schaden | 80 |
|---|---|
| Energie | 50 |
| Schaden | 50 |
|---|---|
| Energie | 33 |
| Wetterbonus |
|
| Dauer | 2.0s |
| Schadensfenster | 1.9s - 1.8s |
| Schaden | 60 |
|---|---|
| Energie | 40 |
| Schaden | 20 |
|---|---|
| Energie | 50 |
| Wetterbonus |
|
| Dauer | 3.0s |
| Schadensfenster | 2.1s - 2.8s |
| Schaden | 20 |
|---|---|
| Energie | 45 |
Säurespeier has a 100.0% chance to:
| Schaden | 105 |
|---|---|
| Energie | 100 |
| Wetterbonus |
|
| Dauer | 3.0s |
| Schadensfenster | 1.8s - 2.8s |
| Schaden | 110 |
|---|---|
| Energie | 65 |
| Schaden | 130 |
|---|---|
| Energie | 100 |
| Wetterbonus |
|
| Dauer | 3.0s |
| Schadensfenster | 1.6s - 2.6s |
| Schaden | 130 |
|---|---|
| Energie | 75 |
Die folgende Tabelle zeigt Sleimoks DPS und TDO für jede Kombination aus Schnell- und Lade-Moves. Diese Tabelle ist nützlich, um die relative Stärke von Sleimoks Movesets zu vergleichen. Du kannst das Wetter und das gegnerische Pokémon ändern, um zu sehen, wie es die Rankings beeinflusst.
Legacy Top-Schnell- und Lade-Attacken können nur während spezieller Events erhalten werden oder indem ein Top-Schnell-TM oder ein Top-Lade-TM verwendet wird. Legacy-Attacken sind mit einem Sternchen (*) markiert. Die obige Tabelle bietet Informationen zu verschiedenen Attacken von Sleimok in Pokémon GO, zusammen mit ihren entsprechenden DPS (Schaden pro Sekunde) und TDO (Totaler Schadensausstoß).
Obwohl es die letzte Form einer Entwicklungsreihe ist, liegt der ANG-Wert von Sleimok bei nur 190, was es zu einer schlechten Wahl für Raid-Kämpfe macht.
Es hat zwar gute KP von 233, aber mit mageren 172 VERT ist Sleimok ein leichtes Ziel gegen die Macht von starken Arena-Angreifern wie Mega-Mewtu Y und X sowie Proto-Groudon.
Der reine Gift-Typ verleiht ihm eine sehr begrenzte Brauchbarkeit im Vergleich zu Alola-Sleimok, und es hat eine unbeholfene Auswahl an Attacken, die schwer zu handhaben sind. Sleimok erzielt in der Superliga nur eine Handvoll Siege, die nicht ausreichen, um ihm einen Platz in deinem Team zu sichern.
Sleimok ist in der Hyperliga besser und besiegt Feen wie Florges und Togekiss, mauert Viridium und Kappalores komplett aus und besiegt sie, und schaltet sogar Cresselia, Crypto-Impergator und Turtok aus. Es hat jedoch immer noch Schwierigkeiten gegen einen Großteil der Meta und wird trotz seiner Resistenz gegen Kampf-Attacken sowohl von regulären als auch von Crypto-Rasaff leicht besiegt. Daher ist Sleimok in diesen Kämpfen eher eine Art Spice-Pick, wobei die Unzuverlässigkeit sein Hauptproblem ist.
Sleimok ist einfach nicht stark genug, um in der Meisterliga zu bestehen.

| Pokédex-Nr. | #89 |
|---|---|
| Höhe | 1.2 m |
| Gewicht | 30 kg |
| Region | Generation 1 |
| Kann gehandelt werden | Erlaubt |
| Kumpel-Distanz | 3 km |
| Veröffentlicht | Ja |
| Schillernd veröffentlicht | Ja |
| Pokémon Home Transfer | Erlaubt |
| Basisfangrate | 20% |
| Basisfluchtrate | 0% |
| Fangbelohnungen | |
| Zusätzliche Attackeskosten |
Eine Liste von Pokémon, die in irgendeiner Weise mit Sleimok in Pokémon GO verwandt sind. Beinhaltet Entwicklungen, regionale und Form-Variationen.
| XXS | XS | M | XL | XXL |
|---|---|---|---|---|
| 0.59 m | 0.6 m | 1.2 m | 1.8 m | 2.4 m |
Die Größe von Sleimok reicht von 0.59 m bis 2.4 m, mit einem Durchschnitt von 1.2 m. Die Illustration zeigt einen Vergleich mit einem 1,70 m (5′07″) großen Trainer. Die maximale Höhe wurde aus Darstellungsgründen auf 450px begrenzt.
Diese Tabelle zeigt die Größengrenzen von Sleimok in Pokémon GO. Die Grenzwerte entsprechen dem minimalen und maximalen Wert jeder Größenkategorie.
| Größe | Untere Grenze | Obere Grenze |
|---|---|---|
| XXS | 0.588 m | 0.6 m |
| 1′11″ | 1′12″ | |
| XS | 0.6 m | 1.2 m |
| 1′12″ | 3′11″ | |
| M | 0.9 m | 1.5 m |
| 2′11″ | 4′11″ | |
| XL | 1.5 m | 1.8 m |
| 4′11″ | 5′11″ | |
| XXL | 1.8 m | 2.4 m |
| 5′11″ | 7′10″ |
| Bewegungstyp | MOVEMENT_JUMP |
|---|---|
| Bewegungstimer | 8s |
| Sprungzeit | 2s |
| Angriffswahrscheinlichkeit | 10.0% |
| Angriffstimer | 3s |
| Ausweichwahrscheinlichkeit | 15.0% |
| Ausweichdauer | 0.0s |
| Ausweichdistanz | 1 |
| Minimale Aktionsfrequenz | 1s |
| Maximale Aktionsfrequenz | 2s |
Sleimok hat ein maximales Wettkampfpunkte (WP) von 3117 (auf Level 50). Ein aus Raids erhaltenes Sleimok kann mit einem WP von 1501 bis 1575 angetroffen werden, oder bei Wetterverstärkung im Bereich von 1876 WP bis 1969 WP. In Feld- und Spezialforschungen kann Sleimok im Bereich von 1125 WP bis 1181 WP gefunden werden.
| 3117 WP | |
| Level 50, 15/15/15 IVs | |
| 1125 WP - 1181 WP | |
| Level 15, mindestens 10/10/10 IVs | |
| 1501 WP - 1575 WP | |
| Level 20, mindestens 10/10/10 IVs | |
| 1501 WP - 1575 WP | |
| Level 20, mindestens 10/10/10 IVs | |
| 1876 WP - 1969 WP | |
| Mit Wetterbonus, Level 25, mindestens 10/10/10 IVs |
Sleimok Max WP pro Level-Diagramm. Diese Tabelle zeigt maximale Wettkampfpunkte von Level 1 bis Level 50.
| LVL | Max WP | LVL | Max WP | LVL | Max WP |
|---|---|---|---|---|---|
| 1 | 39 WP | 2 | 122 WP | 3 | 205 WP |
| 4 | 288 WP | 5 | 371 WP | 6 | 455 WP |
| 7 | 538 WP | 8 | 621 WP | 9 | 704 WP |
| 10 | 788 WP | 11 | 866 WP | 12 | 945 WP |
| 13 | 1024 WP | 14 | 1103 WP | 15 | 1181 WP |
| 16 | 1260 WP | 17 | 1339 WP | 18 | 1418 WP |
| 19 | 1496 WP | 20 | 1575 WP | 21 | 1654 WP |
| 22 | 1733 WP | 23 | 1811 WP | 24 | 1890 WP |
| 25 | 1969 WP | 26 | 2048 WP | 27 | 2127 WP |
| 28 | 2205 WP | 29 | 2284 WP | 30 | 2363 WP |
| 31 | 2402 WP | 32 | 2442 WP | 33 | 2481 WP |
| 34 | 2521 WP | 35 | 2560 WP | 36 | 2599 WP |
| 37 | 2639 WP | 38 | 2678 WP | 39 | 2717 WP |
| 40 | 2757 WP | 41 | 2792 WP | 42 | 2827 WP |
| 43 | 2862 WP | 44 | 2898 WP | 45 | 2934 WP |
| 46 | 2970 WP | 47 | 3006 WP | 48 | 3043 WP |
| 49 | 3080 WP | 50 | 3117 WP |
Eine Liste von Mega-Pokémon, die Sleimoks Gift-Typ-Attacken, Bonbons und XL-Bonbons beim Fangen von Sleimok verstärken.
Mega- und Primal-Raid-Bonus –Mega-Pokémon erhöhen die Angriffskraft aller anderen Pokémon in Raid-Kämpfen um 10%. Attacke, die den Typen des Mega-Pokémons entsprechen, erhalten einen 30% Bonus. Diese Boni addieren sich jedoch nicht, wenn mehrere Mega-entwickelte Pokémon gleichzeitig kämpfen; nur der höhere Bonus wird angewendet.
Mega- und Primal-Fangbonus –Während ein Pokémon Mega-entwickelt ist, werden zusätzliche EP und Bonbons gewährt, wenn ein Pokémon gefangen wird, das denselben Typ wie das Mega-Pokémon hat, oder für jeden gefangenen Raid-Boss. Diese stapeln sich nicht miteinander. Außerdem gewähren hoch- und maximal-levelige Mega-entwickelte Pokémon eine erhöhte Chance, XL-Bonbons zu erhalten, wenn ein Pokémon gefangen wird, das denselben Typ wie das Mega-Pokémon hat.
Hinweis zu Primal Kyogre, Primal Groudon und Mega Rayquaza| Sternenstaub | Bonbons | XL-Bonbons | |
|---|---|---|---|
| LVL 50 | 520,000 | 304 | 296 |
| LVL 40 | 280,000 | 304 | 10 |
| LVL 35 | 190,000 | 196 | - |
| LVL 30 | 125,000 | 126 | - |
| LVL 25 | 80,000 | 87 | - |
| LVL 20 | 47,500 | 58 | - |
| LVL 15 | 25,500 | 38 | - |
| LVL 10 | 11,000 | 19 | - |
| LVL 5 | 3,000 | 9 | - |
Power-Up-Kosten für Sleimok in Pokémon GO. Die Tabelle zeigt den gesamten Sternenstaub, die Bonbons und die XL-Bonbons, die benötigt werden, um Sleimok von Level 1 auf Level 15, 20, 25, 30, 35, 40 und 50 zu bringen. Es kostet dich 520,000 Sternenstaub, 304 Bonbons und 296 XL-Bonbons, um Sleimok in Pokémon GO vollständig aufzuladen.
| LVL | Power-Ups | Sternenstaub | Bonbons | XL-Bonbons | Gesamter Sternenstaub | Gesamte Bonbons | Gesamte XL-Bonbons |
|---|---|---|---|---|---|---|---|
| 1 | 1 | 200 | 1 | - | 200 | 1 | - |
| 1.5 | 2 | 200 | 1 | - | 400 | 2 | - |
| 2 | 3 | 200 | 1 | - | 600 | 3 | - |
| 2.5 | 4 | 200 | 1 | - | 800 | 4 | - |
| 3 | 5 | 400 | 1 | - | 1,200 | 5 | - |
| 3.5 | 6 | 400 | 1 | - | 1,600 | 6 | - |
| 4 | 7 | 400 | 1 | - | 2,000 | 7 | - |
| 4.5 | 8 | 400 | 1 | - | 2,400 | 8 | - |
| 5 | 9 | 600 | 1 | - | 3,000 | 9 | - |
| 5.5 | 10 | 600 | 1 | - | 3,600 | 10 | - |
| 6 | 11 | 600 | 1 | - | 4,200 | 11 | - |
| 6.5 | 12 | 600 | 1 | - | 4,800 | 12 | - |
| 7 | 13 | 800 | 1 | - | 5,600 | 13 | - |
| 7.5 | 14 | 800 | 1 | - | 6,400 | 14 | - |
| 8 | 15 | 800 | 1 | - | 7,200 | 15 | - |
| 8.5 | 16 | 800 | 1 | - | 8,000 | 16 | - |
| 9 | 17 | 1,000 | 1 | - | 9,000 | 17 | - |
| 9.5 | 18 | 1,000 | 1 | - | 10,000 | 18 | - |
| 10 | 19 | 1,000 | 1 | - | 11,000 | 19 | - |
| 10.5 | 20 | 1,000 | 1 | - | 12,000 | 20 | - |
| 11 | 21 | 1,300 | 2 | - | 13,300 | 22 | - |
| 11.5 | 22 | 1,300 | 2 | - | 14,600 | 24 | - |
| 12 | 23 | 1,300 | 2 | - | 15,900 | 26 | - |
| 12.5 | 24 | 1,300 | 2 | - | 17,200 | 28 | - |
| 13 | 25 | 1,600 | 2 | - | 18,800 | 30 | - |
| 13.5 | 26 | 1,600 | 2 | - | 20,400 | 32 | - |
| 14 | 27 | 1,600 | 2 | - | 22,000 | 34 | - |
| 14.5 | 28 | 1,600 | 2 | - | 23,600 | 36 | - |
| 15 | 29 | 1,900 | 2 | - | 25,500 | 38 | - |
| 15.5 | 30 | 1,900 | 2 | - | 27,400 | 40 | - |
| 16 | 31 | 1,900 | 2 | - | 29,300 | 42 | - |
| 16.5 | 32 | 1,900 | 2 | - | 31,200 | 44 | - |
| 17 | 33 | 2,200 | 2 | - | 33,400 | 46 | - |
| 17.5 | 34 | 2,200 | 2 | - | 35,600 | 48 | - |
| 18 | 35 | 2,200 | 2 | - | 37,800 | 50 | - |
| 18.5 | 36 | 2,200 | 2 | - | 40,000 | 52 | - |
| 19 | 37 | 2,500 | 2 | - | 42,500 | 54 | - |
| 19.5 | 38 | 2,500 | 2 | - | 45,000 | 56 | - |
| 20 | 39 | 2,500 | 2 | - | 47,500 | 58 | - |
| 20.5 | 40 | 2,500 | 2 | - | 50,000 | 60 | - |
| 21 | 41 | 3,000 | 3 | - | 53,000 | 63 | - |
| 21.5 | 42 | 3,000 | 3 | - | 56,000 | 66 | - |
| 22 | 43 | 3,000 | 3 | - | 59,000 | 69 | - |
| 22.5 | 44 | 3,000 | 3 | - | 62,000 | 72 | - |
| 23 | 45 | 3,500 | 3 | - | 65,500 | 75 | - |
| 23.5 | 46 | 3,500 | 3 | - | 69,000 | 78 | - |
| 24 | 47 | 3,500 | 3 | - | 72,500 | 81 | - |
| 24.5 | 48 | 3,500 | 3 | - | 76,000 | 84 | - |
| 25 | 49 | 4,000 | 3 | - | 80,000 | 87 | - |
| 25.5 | 50 | 4,000 | 3 | - | 84,000 | 90 | - |
| 26 | 51 | 4,000 | 4 | - | 88,000 | 94 | - |
| 26.5 | 52 | 4,000 | 4 | - | 92,000 | 98 | - |
| 27 | 53 | 4,500 | 4 | - | 96,500 | 102 | - |
| 27.5 | 54 | 4,500 | 4 | - | 101,000 | 106 | - |
| 28 | 55 | 4,500 | 4 | - | 105,500 | 110 | - |
| 28.5 | 56 | 4,500 | 4 | - | 110,000 | 114 | - |
| 29 | 57 | 5,000 | 4 | - | 115,000 | 118 | - |
| 29.5 | 58 | 5,000 | 4 | - | 120,000 | 122 | - |
| 30 | 59 | 5,000 | 4 | - | 125,000 | 126 | - |
| 30.5 | 60 | 5,000 | 4 | - | 130,000 | 130 | - |
| 31 | 61 | 6,000 | 6 | - | 136,000 | 136 | - |
| 31.5 | 62 | 6,000 | 6 | - | 142,000 | 142 | - |
| 32 | 63 | 6,000 | 6 | - | 148,000 | 148 | - |
| 32.5 | 64 | 6,000 | 6 | - | 154,000 | 154 | - |
| 33 | 65 | 7,000 | 8 | - | 161,000 | 162 | - |
| 33.5 | 66 | 7,000 | 8 | - | 168,000 | 170 | - |
| 34 | 67 | 7,000 | 8 | - | 175,000 | 178 | - |
| 34.5 | 68 | 7,000 | 8 | - | 182,000 | 186 | - |
| 35 | 69 | 8,000 | 10 | - | 190,000 | 196 | - |
| 35.5 | 70 | 8,000 | 10 | - | 198,000 | 206 | - |
| 36 | 71 | 8,000 | 10 | - | 206,000 | 216 | - |
| 36.5 | 72 | 8,000 | 10 | - | 214,000 | 226 | - |
| 37 | 73 | 9,000 | 12 | - | 223,000 | 238 | - |
| 37.5 | 74 | 9,000 | 12 | - | 232,000 | 250 | - |
| 38 | 75 | 9,000 | 12 | - | 241,000 | 262 | - |
| 38.5 | 76 | 9,000 | 12 | - | 250,000 | 274 | - |
| 39 | 77 | 10,000 | 15 | - | 260,000 | 289 | - |
| 39.5 | 78 | 10,000 | 15 | - | 270,000 | 304 | - |
| 40 | 79 | 10,000 | - | 10 | 280,000 | 304 | 10 |
| 40.5 | 80 | 10,000 | - | 10 | 290,000 | 304 | 20 |
| 41 | 81 | 11,000 | - | 10 | 301,000 | 304 | 30 |
| 41.5 | 82 | 11,000 | - | 10 | 312,000 | 304 | 40 |
| 42 | 83 | 11,000 | - | 12 | 323,000 | 304 | 52 |
| 42.5 | 84 | 11,000 | - | 12 | 334,000 | 304 | 64 |
| 43 | 85 | 12,000 | - | 12 | 346,000 | 304 | 76 |
| 43.5 | 86 | 12,000 | - | 12 | 358,000 | 304 | 88 |
| 44 | 87 | 12,000 | - | 15 | 370,000 | 304 | 103 |
| 44.5 | 88 | 12,000 | - | 15 | 382,000 | 304 | 118 |
| 45 | 89 | 13,000 | - | 15 | 395,000 | 304 | 133 |
| 45.5 | 90 | 13,000 | - | 15 | 408,000 | 304 | 148 |
| 46 | 91 | 13,000 | - | 17 | 421,000 | 304 | 165 |
| 46.5 | 92 | 13,000 | - | 17 | 434,000 | 304 | 182 |
| 47 | 93 | 14,000 | - | 17 | 448,000 | 304 | 199 |
| 47.5 | 94 | 14,000 | - | 17 | 462,000 | 304 | 216 |
| 48 | 95 | 14,000 | - | 20 | 476,000 | 304 | 236 |
| 48.5 | 96 | 14,000 | - | 20 | 490,000 | 304 | 256 |
| 49 | 97 | 15,000 | - | 20 | 505,000 | 304 | 276 |
| 49.5 | 98 | 15,000 | - | 20 | 520,000 | 304 | 296 |
Als ein Pokémon vom Typ Gift ist Sleimok anfällig gegenüber Boden und Psycho-Typ-Attacken.
Die besten Attacken für Sleimok in Pokémon GO sind Gifthieb und Mülltreffer. Diese Moveset hat einen DPS (Schaden pro Sekunde) von 10,875 und einen TDO (Gesamtschaden) von 233,888.
Sleimok's Raid-Angreifer-Rang ist derzeit unbekannt, hat keine brauchbaren Moves oder ist zu schwach, um eingestuft zu werden.
Sleimok ist ein B-Tier-Gift-Typ-Angreifer, rangiert auf Platz #31 mit begrenztem Nutzen in bestimmten Matchups.
Die folgenden Mega-Pokémon verstärken Sleimok: Mega Bisaflor, Mega Bibor, Mega Sarzenia und Mega Gengar.
Sleimok’s maximales WP auf Level 40 beträgt 2757 WP und 3117 WP auf Level 50.
Sleimok kann als Schillernd in Pokémon GO erscheinen ✨.
Sleimok kann in Pokémon GO nicht dynamaximieren.
The base catch rate for Sleimok in Pokémon GO is 16.74%, calculated for catching a Level 20 with no berries. Curved Great throw has a 37.32% chance to catch, and adding a Razz Berry raises that to 50.38%.
| Normal | Nice | Great | Excellent | ||
|---|---|---|---|---|---|
No Berry | - | 16.74% | 19.00% | 24.03% | 28.75% |
| Curve | 26.76% | 30.10% | 37.32% | 43.79% | |
| - | 24.03% | 27.09% | 33.78% | 39.85% | |
| Curve | 37.32% | 41.56% | 50.38% | 57.86% | |
| - | 28.09% | 31.56% | 39.02% | 45.67% | |
| Curve | 42.91% | 47.52% | 56.87% | 64.55% | |
| - | 36.74% | 40.94% | 49.69% | 57.14% | |
| Curve | 54.09% | 59.15% | 68.90% | 76.32% |
In order to help Trainers understand their overall odds when catching Sleimok, we enable the functionality to showing the total chance to catch it depending on the number of available throws. We calculate this chance as if you repeated the same throw N-number of times.
To activate this functionality, change the number of Number of throws to a value greater than 1. The Number of throws option is available in the configuration options above the chart
Pokémon GO catch rate formula can be expressed as follows:
CATCH_MULTIPLIERS = ball * curve * berry * throwType * (type1Medal + type2Medal / 2)CATCH_RATE = 1 - Math.pow(1 - baseCatchRate / (2 * cpm), CATCH_MULTIPLIERS)There are different multipliers that come into play when calculating catch rate.
Curved throws are more effective than regular throws, stronger types of Poké Ball have a higher catch rate, and using a Razz Berry or a Golden Razz Berry also improves your chances.
The following table shows all the different catch rate multipliers in Pokémon GO:
| Multiplier | Amount |
|---|---|
| Razz Berry | 1.5 |
| Silver Pinap Berry | 1.8 |
| Golden Razz Berry | 2.5 |
| Curveball | 1.7 |
| Nice Throw | 1.15 |
| Great Throw | 1.5 |
| Excellent Throw | 1.85 |
| PokéBall | 1.0 |
| Premier Ball | 1.0 |
| Great Ball | 1.5 |
| Ultra Ball | 2.0 |
| Bronze medal | 1.1 |
| Silver medal | 1.2 |
| Gold medal | 1.3 |
Eine Liste von hochauflösenden Pokémon HOME Sprites, die mit Sleimok in Verbindung stehen. Die Sprite-Beschreibung ist eine Vermutung darüber, was das Sprite darstellt, urteile selbst. Klicke, um die volle 512x512 Auflösung herunterzuladen.
| Versionen | Pokédex-Eintrag |
|---|---|
| Red, Blue | Thickly covered with a filthy, vile sludge. It is so toxic, even its footprints contain poison. |
| Yellow | Smells so awful, it can cause fainting. Through degeneration, it lost its sense of smell. |
| Gold | They love to gath er in smelly areas where sludge ac cumulates, making the stench around them worse. |
| Silver | Its body is made of a powerful poi son. Touching it accidentally will cause a fever that requires bed rest. |
| Crystal | As it moves, a very strong poison leaks from it, making the ground there barren for three years. |
| Ruby | From MUK’s body seeps a foul fluid that gives off a nose-bendingly horrible stench. Just one drop of this POKéMON’s body fluid can turn a pool stagnant and rancid. |
| Sapphire | This POKéMON’s favorite food is anything that is repugnantly filthy. In dirty towns where people think nothing of throwing away litter on the streets, MUK are certain to gather. |
| Emerald | It prefers warm and humid habitats. In the summertime, the toxic substances in its body intensify, making MUK reek like putrid kitchen garbage. |
| FireRed | It is usually undetectable because it blends in with the ground. Touching it can cause terrible poisoning. |
| LeafGreen | Thickly covered with a filthy, vile sludge. It is so toxic, even its footprints contain poison. |
| Diamond, Pearl, Platinum, Black, White | A toxic fluid seeps from its body. The fluid instantly kills plants and trees on contact. |
| HeartGold | They love to gather in smelly areas where sludge accumulates, making the stench around them worse. |
| SoulSilver | Its body is made of a powerful poison. Touching it accidentally will cause a fever that requires bed rest. |
| Black 2, White 2 | It’s so stinky! Muk’s body contains toxic elements, and any plant will wilt when it passes by. |
| X | They love to gather in smelly areas where sludge accumulates, making the stench around them worse. |
| Y | A toxic fluid seeps from its body. The fluid instantly kills plants and trees on contact. |
| Omega Ruby | From Muk’s body seeps a foul fluid that gives off a nose-bendingly horrible stench. Just one drop of this Pokémon’s body fluid can turn a pool stagnant and rancid. |
| Alpha Sapphire | This Pokémon’s favorite food is anything that is repugnantly filthy. In dirty towns where people think nothing of throwing away litter on the streets, Muk are certain to gather. |
| Sun | The stench it gives off will make your nose scrunch up. Still, there are Muk fans who think that’s a good thing. |
| Moon | After recent environmental improvements, this Pokémon is now hardly seen at all. People speculate that it may go extinct at some point. |
| Ultra Sun | Their food sources have decreased, and their numbers have declined sharply. Sludge ponds are being built to prevent their extinction. |
| Ultra Moon | Because they scatter germs everywhere, they’ve long been targeted for extermination, leading to a steep decline in their population. |
| Let's Go, Pikachu!, Let's Go, Eevee! | Smells so awful, it can cause fainting. Through degeneration of its nose, it lost its sense of smell. |
Eine Liste der in Pokémon GO verfügbaren Sleimok Kostüme.