Gifthieb + Matschbombe
Das beste Gift-Moveset für Bibor ist Gifthieb / Matschbombe mit 9.57 DPS und 114.6 TDO. Diese Attacken werden durch Bewölkt-Wetter verstärkt. Bibor belegt mit diesem Moveset Platz #63 (F Tier) der Gift-Angreifer.

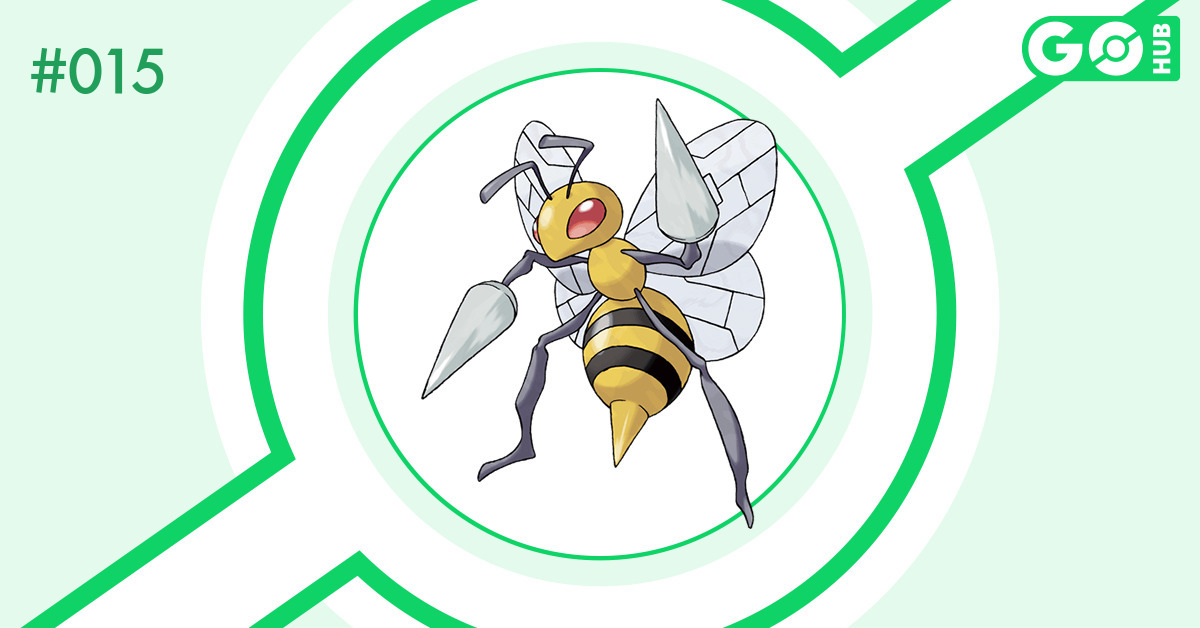
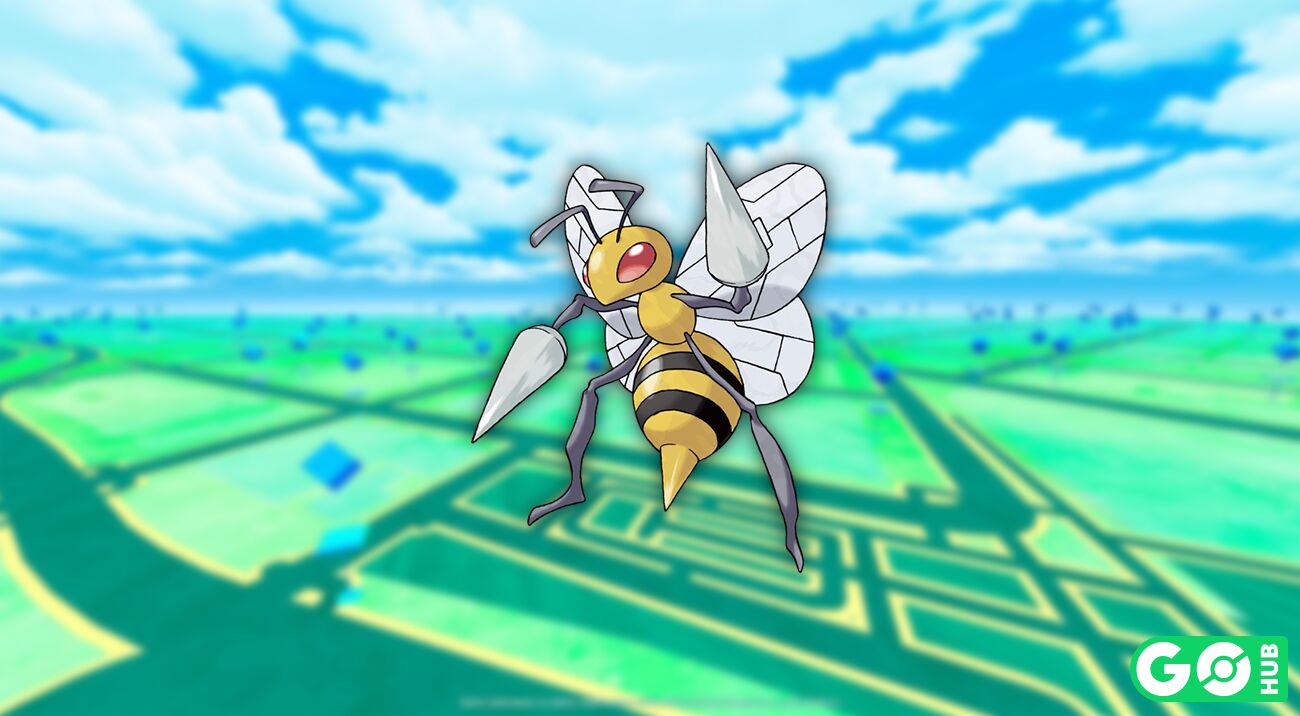
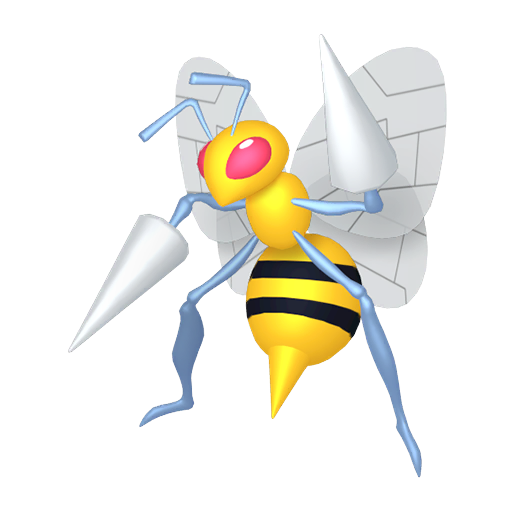
Bibor ist ein Pokémon vom Typ Käfer und Gift in Pokémon GO. Als ein Pokémon vom Typ Käfer und Gift ist Bibor anfällig gegenüber Feuer, Flug, Psycho und Gestein-Typ-Attacken.
Die maximale Wettkampfpunkte von Bibor beträgt 2087 WP, und das empfohlene Pokémon GO-Moveset ist Gifthieb / Matschbombe. Begegnungen mit Bibor werden bei Regen und Bewölkt-Wetter verstärkt. Shiny Bibor ist verfügbar! ✨
# | Fast Attack | Charged Attack | DPS | TDO | Score 🔽 |
|---|---|---|---|---|---|
| 1. | 9.66 | 115.6 | 7.99 | ||
| 2. | 9.57 | 114.6 | 7.92 | ||
| 3. | 9.15 | 109.5 | 7.57 | ||
| 4. | 9.10 | 109.0 | 7.53 | ||
| 5. | 9.03 | 108.1 | 7.47 | ||
| 6. | 9.02 | 108.0 | 7.47 | ||
| 7. | 8.49 | 101.6 | 7.02 | ||
| 8. | 8.40 | 100.5 | 6.95 |
| Schaden | 5 |
|---|---|
| Energie | 6 |
| Wetterbonus |
|
| Dauer | 0.5s |
| Schadensfenster | 0.3s - 0.5s |
| Schaden | 4 |
|---|---|
| Energie | 3 |
| Schaden | 9 |
|---|---|
| Energie | 13 |
| Wetterbonus |
|
| Dauer | 1.0s |
| Schadensfenster | 0.8s - 0.9s |
| Schaden | 6 |
|---|---|
| Energie | 12 |
| Schaden | 13 |
|---|---|
| Energie | 9 |
| Wetterbonus |
|
| Dauer | 1.0s |
| Schadensfenster | 0.4s - 1.0s |
| Schaden | 7 |
|---|---|
| Energie | 7 |
| Schaden | 4 |
|---|---|
| Energie | 6 |
| Wetterbonus |
|
| Dauer | 0.5s |
| Schadensfenster | 0.3s - 0.5s |
| Schaden | 4 |
|---|---|
| Energie | 9 |
| Schaden | 45 |
|---|---|
| Energie | 33 |
| Wetterbonus |
|
| Dauer | 1.5s |
| Schadensfenster | 1.1s - 1.3s |
| Schaden | 65 |
|---|---|
| Energie | 40 |
| Schaden | 45 |
|---|---|
| Energie | 33 |
| Wetterbonus |
|
| Dauer | 2.0s |
| Schadensfenster | 1.6s - 1.8s |
| Schaden | 20 |
|---|---|
| Energie | 35 |
Stachelfinale has a 100.0% chance to:
| Schaden | 55 |
|---|---|
| Energie | 33 |
| Wetterbonus |
|
| Dauer | 2.5s |
| Schadensfenster | 2.0s - 2.3s |
| Schaden | 60 |
|---|---|
| Energie | 45 |
| Schaden | 85 |
|---|---|
| Energie | 50 |
| Wetterbonus |
|
| Dauer | 3.0s |
| Schadensfenster | 1.9s - 2.8s |
| Schaden | 70 |
|---|---|
| Energie | 40 |
| Schaden | 85 |
|---|---|
| Energie | 50 |
| Wetterbonus |
|
| Dauer | 2.5s |
| Schadensfenster | 1.3s - 2.3s |
| Schaden | 80 |
|---|---|
| Energie | 50 |
Die folgende Tabelle zeigt Bibors DPS und TDO für jede Kombination aus Schnell- und Lade-Moves. Diese Tabelle ist nützlich, um die relative Stärke von Bibors Movesets zu vergleichen. Du kannst das Wetter und das gegnerische Pokémon ändern, um zu sehen, wie es die Rankings beeinflusst.
Legacy Top-Schnell- und Lade-Attacken können nur während spezieller Events erhalten werden oder indem ein Top-Schnell-TM oder ein Top-Lade-TM verwendet wird. Legacy-Attacken sind mit einem Sternchen (*) markiert. Die obige Tabelle bietet Informationen zu verschiedenen Attacken von Bibor in Pokémon GO, zusammen mit ihren entsprechenden DPS (Schaden pro Sekunde) und TDO (Totaler Schadensausstoß).
Noch nicht analysiert, komm bald wieder!

| Pokédex-Nr. | #15 |
|---|---|
| Höhe | 1 m |
| Gewicht | 29.5 kg |
| Region | Generation 1 |
| Kann gehandelt werden | Erlaubt |
| Kumpel-Distanz | 1 km |
| Veröffentlicht | Ja |
| Schillernd veröffentlicht | Ja |
| Pokémon Home Transfer | Erlaubt |
| Basisfangrate | 20% |
| Basisfluchtrate | 0% |
| Fangbelohnungen | |
| Zusätzliche Attackeskosten | |
| Mega-Energiebelohnung Für das Laufen als Kumpel |
Eine Liste von Pokémon, die in irgendeiner Weise mit Bibor in Pokémon GO verwandt sind. Beinhaltet Entwicklungen, regionale und Form-Variationen.
| XXS | XS | M | XL | XXL |
|---|---|---|---|---|
| 0.49 m | 0.5 m | 1 m | 1.5 m | 1.75 m |
Die Größe von Bibor reicht von 0.49 m bis 1.75 m, mit einem Durchschnitt von 1 m. Die Illustration zeigt einen Vergleich mit einem 1,70 m (5′07″) großen Trainer. Die maximale Höhe wurde aus Darstellungsgründen auf 450px begrenzt.
Diese Tabelle zeigt die Größengrenzen von Bibor in Pokémon GO. Die Grenzwerte entsprechen dem minimalen und maximalen Wert jeder Größenkategorie.
| Größe | Untere Grenze | Obere Grenze |
|---|---|---|
| XXS | 0.49 m | 0.5 m |
| 1′07″ | 1′08″ | |
| XS | 0.5 m | 1 m |
| 1′08″ | 3′03″ | |
| M | 0.75 m | 1.25 m |
| 2′06″ | 4′01″ | |
| XL | 1.25 m | 1.5 m |
| 4′01″ | 4′11″ | |
| XXL | 1.5 m | 1.75 m |
| 4′11″ | 5′09″ |
| Bewegungstyp | MOVEMENT_ELECTRIC |
|---|---|
| Bewegungstimer | 6s |
| Sprungzeit | 1s |
| Angriffswahrscheinlichkeit | 40.0% |
| Angriffstimer | 17s |
| Ausweichwahrscheinlichkeit | 20.0% |
| Ausweichdauer | 0.0s |
| Ausweichdistanz | 0.125 |
| Minimale Aktionsfrequenz | 1s |
| Maximale Aktionsfrequenz | 2s |
Bibor hat ein maximales Wettkampfpunkte (WP) von 2087 (auf Level 50). Ein aus Raids erhaltenes Bibor kann mit einem WP von 994 bis 1054 angetroffen werden, oder bei Wetterverstärkung im Bereich von 1242 WP bis 1318 WP. In Feld- und Spezialforschungen kann Bibor im Bereich von 745 WP bis 791 WP gefunden werden.
| 2087 WP | |
| Level 50, 15/15/15 IVs | |
| 745 WP - 791 WP | |
| Level 15, mindestens 10/10/10 IVs | |
| 994 WP - 1054 WP | |
| Level 20, mindestens 10/10/10 IVs | |
| 994 WP - 1054 WP | |
| Level 20, mindestens 10/10/10 IVs | |
| 1242 WP - 1318 WP | |
| Mit Wetterbonus, Level 25, mindestens 10/10/10 IVs |
Bibor Max WP pro Level-Diagramm. Diese Tabelle zeigt maximale Wettkampfpunkte von Level 1 bis Level 50.
| LVL | Max WP | LVL | Max WP | LVL | Max WP |
|---|---|---|---|---|---|
| 1 | 26 WP | 2 | 81 WP | 3 | 137 WP |
| 4 | 193 WP | 5 | 249 WP | 6 | 304 WP |
| 7 | 360 WP | 8 | 416 WP | 9 | 471 WP |
| 10 | 527 WP | 11 | 580 WP | 12 | 633 WP |
| 13 | 685 WP | 14 | 738 WP | 15 | 791 WP |
| 16 | 844 WP | 17 | 896 WP | 18 | 949 WP |
| 19 | 1002 WP | 20 | 1054 WP | 21 | 1107 WP |
| 22 | 1160 WP | 23 | 1213 WP | 24 | 1266 WP |
| 25 | 1318 WP | 26 | 1371 WP | 27 | 1424 WP |
| 28 | 1477 WP | 29 | 1529 WP | 30 | 1582 WP |
| 31 | 1608 WP | 32 | 1635 WP | 33 | 1661 WP |
| 34 | 1688 WP | 35 | 1714 WP | 36 | 1740 WP |
| 37 | 1767 WP | 38 | 1793 WP | 39 | 1819 WP |
| 40 | 1846 WP | 41 | 1869 WP | 42 | 1893 WP |
| 43 | 1917 WP | 44 | 1940 WP | 45 | 1964 WP |
| 46 | 1989 WP | 47 | 2013 WP | 48 | 2037 WP |
| 49 | 2062 WP | 50 | 2087 WP |
Eine Liste von Mega-Pokémon, die Bibors Käfer und Gift-Typ-Attacken, Bonbons und XL-Bonbons beim Fangen von Bibor verstärken.
Mega- und Primal-Raid-Bonus –Mega-Pokémon erhöhen die Angriffskraft aller anderen Pokémon in Raid-Kämpfen um 10%. Attacke, die den Typen des Mega-Pokémons entsprechen, erhalten einen 30% Bonus. Diese Boni addieren sich jedoch nicht, wenn mehrere Mega-entwickelte Pokémon gleichzeitig kämpfen; nur der höhere Bonus wird angewendet.
Mega- und Primal-Fangbonus –Während ein Pokémon Mega-entwickelt ist, werden zusätzliche EP und Bonbons gewährt, wenn ein Pokémon gefangen wird, das denselben Typ wie das Mega-Pokémon hat, oder für jeden gefangenen Raid-Boss. Diese stapeln sich nicht miteinander. Außerdem gewähren hoch- und maximal-levelige Mega-entwickelte Pokémon eine erhöhte Chance, XL-Bonbons zu erhalten, wenn ein Pokémon gefangen wird, das denselben Typ wie das Mega-Pokémon hat.
Hinweis zu Primal Kyogre, Primal Groudon und Mega Rayquaza| Sternenstaub | Bonbons | XL-Bonbons | |
|---|---|---|---|
| LVL 50 | 520,000 | 304 | 296 |
| LVL 40 | 280,000 | 304 | 10 |
| LVL 35 | 190,000 | 196 | - |
| LVL 30 | 125,000 | 126 | - |
| LVL 25 | 80,000 | 87 | - |
| LVL 20 | 47,500 | 58 | - |
| LVL 15 | 25,500 | 38 | - |
| LVL 10 | 11,000 | 19 | - |
| LVL 5 | 3,000 | 9 | - |
Power-Up-Kosten für Bibor in Pokémon GO. Die Tabelle zeigt den gesamten Sternenstaub, die Bonbons und die XL-Bonbons, die benötigt werden, um Bibor von Level 1 auf Level 15, 20, 25, 30, 35, 40 und 50 zu bringen. Es kostet dich 520,000 Sternenstaub, 304 Bonbons und 296 XL-Bonbons, um Bibor in Pokémon GO vollständig aufzuladen.
| LVL | Power-Ups | Sternenstaub | Bonbons | XL-Bonbons | Gesamter Sternenstaub | Gesamte Bonbons | Gesamte XL-Bonbons |
|---|---|---|---|---|---|---|---|
| 1 | 1 | 200 | 1 | - | 200 | 1 | - |
| 1.5 | 2 | 200 | 1 | - | 400 | 2 | - |
| 2 | 3 | 200 | 1 | - | 600 | 3 | - |
| 2.5 | 4 | 200 | 1 | - | 800 | 4 | - |
| 3 | 5 | 400 | 1 | - | 1,200 | 5 | - |
| 3.5 | 6 | 400 | 1 | - | 1,600 | 6 | - |
| 4 | 7 | 400 | 1 | - | 2,000 | 7 | - |
| 4.5 | 8 | 400 | 1 | - | 2,400 | 8 | - |
| 5 | 9 | 600 | 1 | - | 3,000 | 9 | - |
| 5.5 | 10 | 600 | 1 | - | 3,600 | 10 | - |
| 6 | 11 | 600 | 1 | - | 4,200 | 11 | - |
| 6.5 | 12 | 600 | 1 | - | 4,800 | 12 | - |
| 7 | 13 | 800 | 1 | - | 5,600 | 13 | - |
| 7.5 | 14 | 800 | 1 | - | 6,400 | 14 | - |
| 8 | 15 | 800 | 1 | - | 7,200 | 15 | - |
| 8.5 | 16 | 800 | 1 | - | 8,000 | 16 | - |
| 9 | 17 | 1,000 | 1 | - | 9,000 | 17 | - |
| 9.5 | 18 | 1,000 | 1 | - | 10,000 | 18 | - |
| 10 | 19 | 1,000 | 1 | - | 11,000 | 19 | - |
| 10.5 | 20 | 1,000 | 1 | - | 12,000 | 20 | - |
| 11 | 21 | 1,300 | 2 | - | 13,300 | 22 | - |
| 11.5 | 22 | 1,300 | 2 | - | 14,600 | 24 | - |
| 12 | 23 | 1,300 | 2 | - | 15,900 | 26 | - |
| 12.5 | 24 | 1,300 | 2 | - | 17,200 | 28 | - |
| 13 | 25 | 1,600 | 2 | - | 18,800 | 30 | - |
| 13.5 | 26 | 1,600 | 2 | - | 20,400 | 32 | - |
| 14 | 27 | 1,600 | 2 | - | 22,000 | 34 | - |
| 14.5 | 28 | 1,600 | 2 | - | 23,600 | 36 | - |
| 15 | 29 | 1,900 | 2 | - | 25,500 | 38 | - |
| 15.5 | 30 | 1,900 | 2 | - | 27,400 | 40 | - |
| 16 | 31 | 1,900 | 2 | - | 29,300 | 42 | - |
| 16.5 | 32 | 1,900 | 2 | - | 31,200 | 44 | - |
| 17 | 33 | 2,200 | 2 | - | 33,400 | 46 | - |
| 17.5 | 34 | 2,200 | 2 | - | 35,600 | 48 | - |
| 18 | 35 | 2,200 | 2 | - | 37,800 | 50 | - |
| 18.5 | 36 | 2,200 | 2 | - | 40,000 | 52 | - |
| 19 | 37 | 2,500 | 2 | - | 42,500 | 54 | - |
| 19.5 | 38 | 2,500 | 2 | - | 45,000 | 56 | - |
| 20 | 39 | 2,500 | 2 | - | 47,500 | 58 | - |
| 20.5 | 40 | 2,500 | 2 | - | 50,000 | 60 | - |
| 21 | 41 | 3,000 | 3 | - | 53,000 | 63 | - |
| 21.5 | 42 | 3,000 | 3 | - | 56,000 | 66 | - |
| 22 | 43 | 3,000 | 3 | - | 59,000 | 69 | - |
| 22.5 | 44 | 3,000 | 3 | - | 62,000 | 72 | - |
| 23 | 45 | 3,500 | 3 | - | 65,500 | 75 | - |
| 23.5 | 46 | 3,500 | 3 | - | 69,000 | 78 | - |
| 24 | 47 | 3,500 | 3 | - | 72,500 | 81 | - |
| 24.5 | 48 | 3,500 | 3 | - | 76,000 | 84 | - |
| 25 | 49 | 4,000 | 3 | - | 80,000 | 87 | - |
| 25.5 | 50 | 4,000 | 3 | - | 84,000 | 90 | - |
| 26 | 51 | 4,000 | 4 | - | 88,000 | 94 | - |
| 26.5 | 52 | 4,000 | 4 | - | 92,000 | 98 | - |
| 27 | 53 | 4,500 | 4 | - | 96,500 | 102 | - |
| 27.5 | 54 | 4,500 | 4 | - | 101,000 | 106 | - |
| 28 | 55 | 4,500 | 4 | - | 105,500 | 110 | - |
| 28.5 | 56 | 4,500 | 4 | - | 110,000 | 114 | - |
| 29 | 57 | 5,000 | 4 | - | 115,000 | 118 | - |
| 29.5 | 58 | 5,000 | 4 | - | 120,000 | 122 | - |
| 30 | 59 | 5,000 | 4 | - | 125,000 | 126 | - |
| 30.5 | 60 | 5,000 | 4 | - | 130,000 | 130 | - |
| 31 | 61 | 6,000 | 6 | - | 136,000 | 136 | - |
| 31.5 | 62 | 6,000 | 6 | - | 142,000 | 142 | - |
| 32 | 63 | 6,000 | 6 | - | 148,000 | 148 | - |
| 32.5 | 64 | 6,000 | 6 | - | 154,000 | 154 | - |
| 33 | 65 | 7,000 | 8 | - | 161,000 | 162 | - |
| 33.5 | 66 | 7,000 | 8 | - | 168,000 | 170 | - |
| 34 | 67 | 7,000 | 8 | - | 175,000 | 178 | - |
| 34.5 | 68 | 7,000 | 8 | - | 182,000 | 186 | - |
| 35 | 69 | 8,000 | 10 | - | 190,000 | 196 | - |
| 35.5 | 70 | 8,000 | 10 | - | 198,000 | 206 | - |
| 36 | 71 | 8,000 | 10 | - | 206,000 | 216 | - |
| 36.5 | 72 | 8,000 | 10 | - | 214,000 | 226 | - |
| 37 | 73 | 9,000 | 12 | - | 223,000 | 238 | - |
| 37.5 | 74 | 9,000 | 12 | - | 232,000 | 250 | - |
| 38 | 75 | 9,000 | 12 | - | 241,000 | 262 | - |
| 38.5 | 76 | 9,000 | 12 | - | 250,000 | 274 | - |
| 39 | 77 | 10,000 | 15 | - | 260,000 | 289 | - |
| 39.5 | 78 | 10,000 | 15 | - | 270,000 | 304 | - |
| 40 | 79 | 10,000 | - | 10 | 280,000 | 304 | 10 |
| 40.5 | 80 | 10,000 | - | 10 | 290,000 | 304 | 20 |
| 41 | 81 | 11,000 | - | 10 | 301,000 | 304 | 30 |
| 41.5 | 82 | 11,000 | - | 10 | 312,000 | 304 | 40 |
| 42 | 83 | 11,000 | - | 12 | 323,000 | 304 | 52 |
| 42.5 | 84 | 11,000 | - | 12 | 334,000 | 304 | 64 |
| 43 | 85 | 12,000 | - | 12 | 346,000 | 304 | 76 |
| 43.5 | 86 | 12,000 | - | 12 | 358,000 | 304 | 88 |
| 44 | 87 | 12,000 | - | 15 | 370,000 | 304 | 103 |
| 44.5 | 88 | 12,000 | - | 15 | 382,000 | 304 | 118 |
| 45 | 89 | 13,000 | - | 15 | 395,000 | 304 | 133 |
| 45.5 | 90 | 13,000 | - | 15 | 408,000 | 304 | 148 |
| 46 | 91 | 13,000 | - | 17 | 421,000 | 304 | 165 |
| 46.5 | 92 | 13,000 | - | 17 | 434,000 | 304 | 182 |
| 47 | 93 | 14,000 | - | 17 | 448,000 | 304 | 199 |
| 47.5 | 94 | 14,000 | - | 17 | 462,000 | 304 | 216 |
| 48 | 95 | 14,000 | - | 20 | 476,000 | 304 | 236 |
| 48.5 | 96 | 14,000 | - | 20 | 490,000 | 304 | 256 |
| 49 | 97 | 15,000 | - | 20 | 505,000 | 304 | 276 |
| 49.5 | 98 | 15,000 | - | 20 | 520,000 | 304 | 296 |
Als ein Pokémon vom Typ Käfer und Gift ist Bibor anfällig gegenüber Feuer, Flug, Psycho und Gestein-Typ-Attacken.
Die besten Attacken für Bibor in Pokémon GO sind Käferbiss und Matschbombe. Diese Moveset hat einen DPS (Schaden pro Sekunde) von 9,657 und einen TDO (Gesamtschaden) von 115,623.
Bibor's Raid-Angreifer-Rang ist derzeit unbekannt, hat keine brauchbaren Moves oder ist zu schwach, um eingestuft zu werden.
Bibor ist ein F-Tier-Käfer-Typ-Angreifer und wird nicht für Raid-Kämpfe empfohlen.
Bibor ist ein F-Tier-Gift-Typ-Angreifer und wird nicht für Raid-Kämpfe empfohlen.
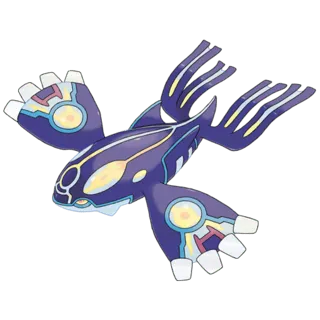
Die folgenden Mega-Pokémon verstärken Bibor: Mega Bibor, Mega Pinsir, Mega Scherox, Mega Skaraborn, Proto-Kyogre, Mega Bisaflor, Mega Bibor, Mega Sarzenia und Mega Gengar.
Bibor’s maximales WP auf Level 40 beträgt 1846 WP und 2087 WP auf Level 50.
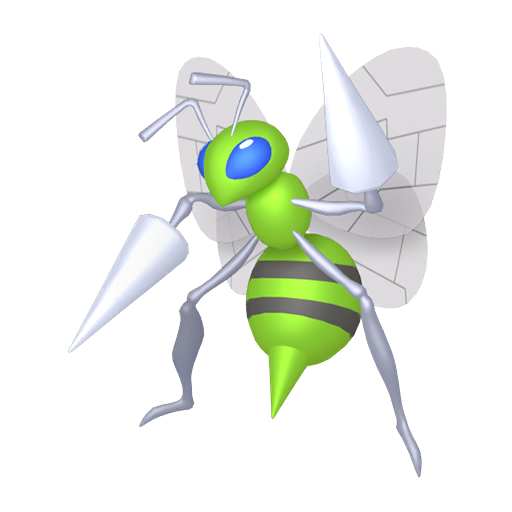
Bibor kann als Schillernd in Pokémon GO erscheinen ✨.
Bibor kann in Pokémon GO nicht dynamaximieren.
| Pokémon | Erfordert | Entwicklung |
|---|---|---|
 Hornliu Hornliu |
|  Kokuna Kokuna |
| Kokuna |
|  Bibor Bibor |
| Bibor |
|  Mega Bibor Mega Bibor |
The base catch rate for Bibor in Pokémon GO is 16.74%, calculated for catching a Level 20 with no berries. Curved Great throw has a 37.32% chance to catch, and adding a Razz Berry raises that to 50.38%.
| Normal | Nice | Great | Excellent | ||
|---|---|---|---|---|---|
No Berry | - | 16.74% | 19.00% | 24.03% | 28.75% |
| Curve | 26.76% | 30.10% | 37.32% | 43.79% | |
| - | 24.03% | 27.09% | 33.78% | 39.85% | |
| Curve | 37.32% | 41.56% | 50.38% | 57.86% | |
| - | 28.09% | 31.56% | 39.02% | 45.67% | |
| Curve | 42.91% | 47.52% | 56.87% | 64.55% | |
| - | 36.74% | 40.94% | 49.69% | 57.14% | |
| Curve | 54.09% | 59.15% | 68.90% | 76.32% |
In order to help Trainers understand their overall odds when catching Bibor, we enable the functionality to showing the total chance to catch it depending on the number of available throws. We calculate this chance as if you repeated the same throw N-number of times.
To activate this functionality, change the number of Number of throws to a value greater than 1. The Number of throws option is available in the configuration options above the chart
Pokémon GO catch rate formula can be expressed as follows:
CATCH_MULTIPLIERS = ball * curve * berry * throwType * (type1Medal + type2Medal / 2)CATCH_RATE = 1 - Math.pow(1 - baseCatchRate / (2 * cpm), CATCH_MULTIPLIERS)There are different multipliers that come into play when calculating catch rate.
Curved throws are more effective than regular throws, stronger types of Poké Ball have a higher catch rate, and using a Razz Berry or a Golden Razz Berry also improves your chances.
The following table shows all the different catch rate multipliers in Pokémon GO:
| Multiplier | Amount |
|---|---|
| Razz Berry | 1.5 |
| Silver Pinap Berry | 1.8 |
| Golden Razz Berry | 2.5 |
| Curveball | 1.7 |
| Nice Throw | 1.15 |
| Great Throw | 1.5 |
| Excellent Throw | 1.85 |
| PokéBall | 1.0 |
| Premier Ball | 1.0 |
| Great Ball | 1.5 |
| Ultra Ball | 2.0 |
| Bronze medal | 1.1 |
| Silver medal | 1.2 |
| Gold medal | 1.3 |
Eine Liste von hochauflösenden Pokémon HOME Sprites, die mit Bibor in Verbindung stehen. Die Sprite-Beschreibung ist eine Vermutung darüber, was das Sprite darstellt, urteile selbst. Klicke, um die volle 512x512 Auflösung herunterzuladen.


| Versionen | Pokédex-Eintrag |
|---|---|
| Red, Blue | Flies at high speed and attacks using its large venomous stingers on its forelegs and tail. |
| Yellow | It has 3 poisonous stingers on its forelegs and its tail. They are used to jab its enemy repeatedly. |
| Gold | It can take down any opponent with its powerful poi son stingers. It sometimes attacks in swarms. |
| Silver | It has three poison barbs. The barb on its tail secretes the most powerful poison. |
| Crystal | It uses sharp, poisonous stings to defeat prey, then takes the victim back to its nest for food. |
| Ruby, Sapphire | BEEDRILL is extremely territorial. No one should ever approach its nest - this is for their own safety. If angered, they will attack in a furious swarm. |
| Emerald | A BEEDRILL is extremely territorial. For safety reasons, no one should ever approach its nest. If angered, they will attack in a swarm. |
| FireRed | May appear in a swarm. Flies at violent speeds, all the while stabbing with the toxic stinger on its rear. |
| LeafGreen | It flies at high speed and attacks using the large venomous stingers on its forelegs and tail. |
| Diamond, Pearl, Platinum, Black, White, Black 2, White 2 | Its best attack involves flying around at high speed, striking with poison needles, then flying off. |
| HeartGold | It can take down any opponent with its powerful poison stingers. It sometimes attacks in swarms. |
| SoulSilver | It has three poison barbs. The barb on its tail secretes the most powerful poison. |
| X | It has three poisonous stingers on its forelegs and its tail. They are used to jab its enemy repeatedly. |
| Y | May appear in a swarm. Flies at violent speeds, all the while stabbing with the toxic stinger on its rear. |
| Omega Ruby, Alpha Sapphire | Beedrill is extremely territorial. No one should ever approach its nest—this is for their own safety. If angered, they will attack in a furious swarm. |
| Let's Go, Pikachu!, Let's Go, Eevee! | It has three poisonous stingers on its forelegs and its tail. They are used to jab its enemy repeatedly. |


Noch nicht analysiert, komm bald wieder!